Let's Design and Build a (mostly) Digital Theremin!

Posted: 3/22/2020 9:13:33 PM
tinkeringdude

From: Germany

Joined: 8/30/2014

Yeah, what it does to the lungs of some is quite scary. It's not just the flu. It's the KUNG FLU !

Just a very few weeks ago they (officials, well, the part they let out through regular media) here also did not take it that seriously.
I guess in part due to the apparent downplaying that China initially did... to, I don't know, bet on saving their economy, and now draining down the world's economy which doesn't help them exactly either?
But then, I guess, the skyrocketing of the numbers in Italy made it clear this is out of the orderly.

Posted: 3/22/2020 9:26:50 PM
pitts8rh

From: Minnesota USA

Joined: 11/27/2015

Hey Eric,

I just saw your Benchy.  Never mind what I just wrote to you... 

I've got a lot of those little boats sitting around here, and that is as good as I've seen.  No wonder you're off printing knobs already.  Excellent!

Posted: 3/23/2020 9:26:55 PM
dewster

From: Northern NJ, USA

Joined: 2/17/2012

3D House Of Beef

More printing today, this time with the new gray PLA:

A shrunken benchy boat (50%), a shrunken skull (50%) and three of Roger's parts.  It's wild watching it do threads, and then actually threading them together!  The skull mandible was hell, had to pull it into FreeCAD and delete the posts that attach the top of the skull so I could rotate it and lay it down on the table in the slicer.  Watching the skull print was like a slo-mo MRI so you get an anatomy lesson; the cheek and orbital bones are so frail, it's obvious why they're so easily broken in real life.  The nozzle circled round and round each little tooth, lotsa detail!

Discovered the X axis belt was loose, making all of Rogers parts somewhat elongated in Y, but they still fit together nicely.

Posted: 3/23/2020 11:07:19 PM
tinkeringdude

From: Germany

Joined: 8/30/2014

Is FreeCADs "undo" still so utterly broken as it was 2 years ago?

Posted: 3/24/2020 12:53:47 PM
pitts8rh

From: Minnesota USA

Joined: 11/27/2015

Wow!  Those prints look great! No stringing, and your layer lines on the antenna mount look very consistent.  I am really happy that this has gone so smoothly for you.  It's not always that easy to get prints this nice right away.

To calibrate your print dimensions you'll need to use some terminal interface to see what your current steps-per-unit values are for the axes.  I recommend Octoprint, but I believe that a program called Pronterface will also work:

To calibrate you need to print a calibration cube from Thingiverse ( or draw something up yourself).  The cubes are usually 20x20x20mm. 

1)  Measure the actual printed size after completion.  Calculate the correction multipliers that you need for the x, y and z axes.  For example, if the actual printed dimension for the y axis is 19.7mm instead of 20mm, the y correction would be 20/19.7=1.01523.

2) Using the terminal function in Octoprint (or whatever), send M503 and read the response.  This will list off a bunch of current firmware settings. It also helps to have the Autoscroll plugin installed in Octoprint when using the terminal function. You may have to suppress temperature readings to keep the screen response from scrolling away.  You are looking for the "M92" line.

3) You will see the current calibration numbers listed on the M92 line.  As an example, M92 X80 Y80 Z400 E455.  This shows the steps/unit for the x, y, z, and extruder motors.

4)  Enter a command with the original numbers corrected by your calculated multipliers from step 1.  For now keep the "E" number the same (that's extruder calibration, which you can do another time).  For example, your new settings may look like "M92 X81.218 Y81.218 Z401.35 E455" .  Send this and you should receive a confirmation response.

5) Send M500 if you want to store the new settings in eeprom.  Otherwise you could just go to step 6 as long as you remember to store the settings later.

6)  Print a new cube and confirm your new dimensions.  Make more corrections if/as needed.

Alternatively, you can put the M92 command in your prefix gcode in Cura if you would rather test it out before committing it to eeprom.  Go to Preference>Configure Cura>Printers>Machine Settings and expand the window under "Start Gcode". If the window is empty, click inside the window and the text will appear.  You can insert your M92... command line into the existing start gcode. Note that there is no save command; just close the window and it will be saved.  The corrected steps/unit will now override the eeprom settings (but only for the Cura slicer).


Also, if you want to try printing Fuzzy under the "Experimental" section at the bottom of the long list of settings Cura (Preferences>Settings> and check the "check all" box if you don't see the advanced settings), do this:

1) Check both the "Fuzzy Skin" and "Fuzzy Skin Outside Only" boxes.

2) I use the numbers 0.3, 0.1, and 0.2 respectively for the three lines that follow the check boxes (I don't remember what they are).  With a layer height of 0.16mm this gives a tight texture pattern that I have used on my D-Lev II parts. Experiment with these numbers.

3) If you want to do partial fuzzy prints (like making the knob fuzzy with clear threads) you have to splice g-code with Notepad++, but this has already gone off topic far enough. 

In no time you'll be making all sorts of widgets for your prototypes.  I never should have waited so long to accept this technology.  For prototyping, it's like having a helper that fabricates a part while you are off designing the next piece.

Enjoy!

Posted: 3/24/2020 2:26:07 PM
dewster

From: Northern NJ, USA

Joined: 2/17/2012

"What *do* you actually plan to do with it?"  - tinkeringdude

Mostly to print Theremin parts that Roger designed and hopefully at some point a few of my own.  His volume side antenna attachment (shown in my photo) is quite interesting, and his LCD panel bezel & attachments could be useful to me too, depending on which way the D-Lev tour goes (hopefully not into the ditch!).

"I guess you are aware of thingiverse.com?"

That's where I got the skull pattern from.  Their web pages are super slow for me.

"Unless you like it procedural: https://www.openscad.org/"

Thanks for that!  I'll check it out.

"Anyway: One thing I remembered from trials was that a print can become bad if there is air draft from open windows that cools parts of a thing being printed. E.g. might skew."

It seems a little weird that they just blow plain old room air on the cooling filament and everything else, you might think they would want to regulate the temperature of that too, though I suppose a heated enclosure would accomplish that.

"Apparently, bed height adjustment is critical for good results. And easiest to get right in the beginning is PLA material."

Yes, the first thing I downloaded was a tiny gcode program that helps you level the table.  Before I print I preheat the Ender-3 and then run that, using a piece of paper to check the distance between the nozzle and the table at 5 points twice.  My table has a slight dip in the middle.

"Is FreeCADs "undo" still so utterly broken as it was 2 years ago?"

I did end up painted into a corner at one point, so I closed it and opened it again and started over.  I know almost zero about it, but it strikes me as one of those projects where they filled the menus full of operations, and then got bored.  Like 99% of the paint programs out there, it seems everyone has written one but almost no one follows through.

Posted: 3/24/2020 2:59:22 PM
dewster

From: Northern NJ, USA

Joined: 2/17/2012

"Wow!  Those prints look great! No stringing, and your layer lines on the antenna mount look very consistent.  I am really happy that this has gone so smoothly for you.  It's not always that easy to get prints this nice right away."  - pitts8rh

It is working out eerily too well!  Perhaps part of it is having taken some power electronics courses & labs in college, where you become acutely aware of substantial inefficiencies associated with even minor motor misalignment.  That and operating / programming CNC mills for years.  I did everything I could think of to get the axes right before applying power.  I'll do a proper calibration cube next, thanks for the detailed instructions!

"Also, if you want to try printing Fuzzy under the "Experimental" section at the bottom of the long list of settings Cura (Preferences>Settings> and check the "check all" box if you don't see the advanced settings), do this:
1) Check both the "Fuzzy Skin" and "Fuzzy Skin Outside Only" boxes.
2) I use the numbers 0.3, 0.1, and 0.2 respectively for the three lines that follow the check boxes (I don't remember what they are).  With a layer height of 0.16mm this gives a tight texture pattern that I have used on my D-Lev II parts. Experiment with these numbers.
3) If you want to do partial fuzzy prints (like making the knob fuzzy with clear threads) you have to splice g-code with Notepad++, but this has already gone off topic far enough."

I was wondering what the origin of the nubby texture was!  Merging nubby & non-nubby g-code makes sense (I read raw 2.5D g-code for years).  Once I get things properly calibrated I'll give the semi-nubby knob a shot.

[EDIT] Picking your brain:
1. What other basic settings do you use?  The outer skin thickness default is 3 layers, and I was thinking that high stress parts like the volume bushing might benefit from more layers, or even being solid. 
2. For cylindrical parts it might be nice to have the last outer flat section be concentric rings rather than straight lines, if only for cosmetic reasons - not sure if that's an option?
3. How long is the nozzle good for?  More than a reel of plastic?
4. How long can the plastic sit out before becoming too moisture-laden?

"In no time you'll be making all sorts of widgets for your prototypes.  I never should have waited so long to accept this technology.  For prototyping, it's like having a helper that fabricates a part while you are off designing the next piece."

It is weird to have non-human activity going on in the house, busily cranking out human skulls and such.

Posted: 3/24/2020 4:57:46 PM
pitts8rh

From: Minnesota USA

Joined: 11/27/2015

"What other basic settings do you use?" -Dewster

Where to start...

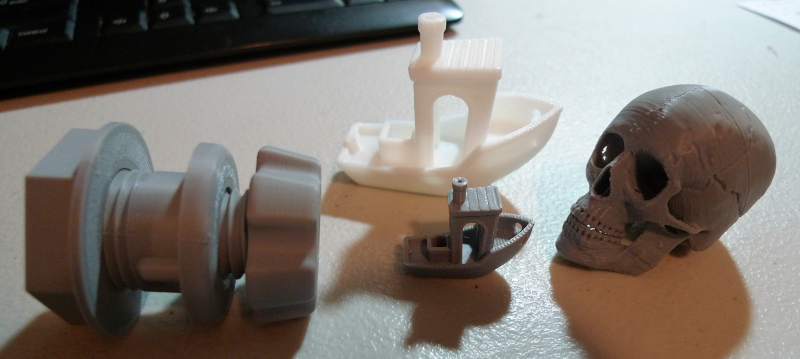
I don't know if this is good practice, but I am finding that each of the parts I design quite often needs it's own slightly modified profile, so I've been creating new profiles with the part name in the profile name.  This is obviously needed for fuzzy and smooth parts, but there are other less obvious reasons to do it.  For example, if a part really need to have strength along the layer lines (which is always the weak spot in any print) I will run the temperature high and the fan speed at 20% or even 0%.  This results in better layer to layer bonding.  But in most cases I don't want the temperature that high because it does cause some loss of definition.  I start with a profile closest to what I want, decide what minor changes it needs and make those changes, click the down arrow to the right of the star in the "Profile" box and choose "Create new profile using current settings/overrides" and then name it appropriately.

I've been on PETG on the Sidewinder for so long I've forgotten some of my PLA settings, but here are some settings from one of my tweaked Creality profiles that I use to print the bezel backplate in PETG (very superficial list):

Quality
Layer Height: 0.16
Sometimes .24 or even .28 for fast prototypes with a 0.4mm nozzle. 

Shell
Wall line count:  5           
Usually 4 for most finished parts, but higher here because the walls are thin and I wanted them solid.  Use 2 for fast prototypes.  If a part has holes to be tapped or accept self-tapping screws, I always use at least 4 and often more lines depending on the depth of the thread cut

Top/Bottom Layers: 6     
Usually 3 or 4 for most final prints, but again I didn't want any infill on this particular part.  2 for prototypes.

Top/Bottom pattern:  Lines  
To answer your other question, this is where you can choose "concentric", although it is weaker.  Concentric works on shapes other than cylindrical too.

Outer before inner walls: checked
This usually gives better cosmetic appearance if you print the outer wall first.  Leave unchecked if you have to print overhangs.

Z seam alignment: sharpest corner
Random is best for fuzzy parts, but on smooth it leaves the z seam bumps scattered all over the part.

Z seam position:  back
Varies depending on the part. 

Seam corner preference : hide seam 
This varies if the part needs to fit something else- sometimes it's better to have it exposed so that you can trim or sand it

Infill
Infill density: 20% 
I'm not sure if this bezel backplate even has any infill.  I use 10% for quick prototypes and sometimes 30 to 40% for structural

Material
Temperature: 245C (for PETG)
I almost always use an extra 10 degrees for the initial layer to promote adhesion. 

Flow :  97.5% for all flows except infill at 135% and initial layer at 110%.
This is highly printer-dependent, so take it as such.  If you find that your nozzle is accumulating blobs or the printed lines have the appearance of being smeared, reduce the flow.  Just be sure to calibrate your extruder before trying to correct things in the slicer, however.  I keep the infill flow high because there is a tendency for gaps in flow when a grid line crosses another at right angles.  The nozzle flow gets scraped off as it crosses a previously printed lined, causing a momentary interruption in flow.  Sometimes I switch to "Zigzag" infill pattern to prevent this.

Retraction : 2mm 
This is unusually low for a bowden extruder.  I usually have this at about 6mm, but I was either experimenting here or based it on actual tests where I manually pushed filament at the extruder to see what movement it took to start and stop flow at the nozzle.  If you have tight tube couplings and snug fitting PTFE tube like Capricorn, this may be sufficient (it works for me on this particular part).

Speed 
50mm/s for everything except 15mm/s for initial layer. 
I could do faster but quality suffers and I don't care how long the prints take. PLA can print faster than PETG in most cases.

Acceleration: 2000mm/sec*sec. 
High values reduce bulging at corners because there is less slowdown, but it can be harder on the mechanics.

Jerk: 8
This is not the same as the physics term, which is the derivative of acceleration.  If you see ghosting or rippling after x/y surface features, reduce this.

Cooling
Fan speed:  20 to 50% for PETG unless parts art very small, then higher.  100% for PLA.
I always have 0% for the initial layer to improve the first layer bond.

Support
This is too complicated to get into here, and I would have to just send you a profile and probably talk about it separately.  It's a fine line between getting a reasonable surface finish on overhangs but still having supports that can be removed without destroying everything.

Built Plate Adhesion
I always use a 3 line skirt to get the nozzle cleared out and to allow time to babystep the nozzle clearance, unless the part is tall and has little surface area for bonding to the build plate.  In that case I use a brim to widen the base.  Rafts are pretty rare.


I've only touched on a few things, but as you can see in Cura there are a few other settings.  I wasn't kidding when I said that printing was a problem with 400+ variables. 

BTW, Overture sells  3-packs of filament for a much better price than buying separately.  I get gray and black in 3-packs from Amazon.


Posted: 3/24/2020 5:07:51 PM
pitts8rh

From: Minnesota USA

Joined: 11/27/2015

"3. How long is the nozzle good for?  More than a reel of plastic?"

Oh absolutely. I'm still on my original nozzles.  Abrasive materials such as carbon fiber or wood fibers can cause more wear, but pure plastics will cause little wear.  Aftermarket nozzles are usually like five or six dollars for a 5-pack.

"4. How long can the plastic sit out before becoming too moisture-laden?"

It depends on your humidity, but I just leave mine on the printer day to day unless I won't be using it for a week or so, or longer in the winters which are terribly dry here. You can just put it back in the resealable bag with the desiccant pack (which can also be baked to refresh it).  The desiccant will maintain it but won't really dry it out if it's contaminated, so try not to let that happen in the first place.  I guess you can slow-bake moisture-laden filament to dry it out, but I haven't tried it.

Posted: 3/24/2020 8:16:46 PM
tinkeringdude

From: Germany

Joined: 8/30/2014

Just make sure to never put that skull on the fireplace. That may attract dangerous weirdos!
https://www.youtube.com/watch?v=-zdun7j-Dj8&t=53m0s

You must be logged in to post a reply. Please log in or register for a new account.