Let's Design and Build a (mostly) Digital Theremin!

Posted: 1/16/2021 9:44:23 PM
dewster

From: Northern NJ, USA

Joined: 2/17/2012

"I suggest that you try the saw preset with some of these"  - pitts8rh

Ha ha!  OK smart boy here's my stab at all of them (with the exception of the Butthole Surfer's tune): [MP3].

I've never played any of these on Theremin previous to today, and I wasn't familiar with the Cuckoo's Nest theme at all so I played along with YouTube for a bit, so it's not exactly my best and brightest here.  (<= filling everyone with enthusiasm)

I think the trick is to play sorta slow and fully engage that Ethel Merman vibrato 24/7.  The vibrato of a real saw is done either via the leg clamp, or with the left hand.

Posted: 1/20/2021 6:26:48 PM
Channel Road Amps

From: Lopez Island, WA

Joined: 11/25/2014

TouchlessRoger cleverly made some encoder knobs out of wire nuts and sent me some pix.  The idea here is to make the knobs as small as possible so the encoders can be tightly packed together without interference when twiddling them.

Dewster, just in case you hadn't found this place, Tayda Electronics has a big selection of knobs including some that are pretty small in diameter.  They are located in Thailand, but their "economic expedited shipping" is cheap and reliably got things to me in the US within about a week.

Posted: 1/20/2021 6:46:10 PM
dewster

From: Northern NJ, USA

Joined: 2/17/2012

"Dewster, just in case you hadn't found this place, Tayda Electronics has a big selection of knobs including some that are pretty small in diameter.  They are located in Thailand, but their "economic expedited shipping" is cheap and reliably got things to me in the US within about a week."  - Channel Road Amps

Thanks for that!  I didn't see any that were super appropriate for encoders (no pointer).  They certainly have nice prices and I'll keep them in mind!

Posted: 1/20/2021 8:31:19 PM
dewster

From: Northern NJ, USA

Joined: 2/17/2012

P4 (Playing Along With The Home Edition Of Jeopardy)

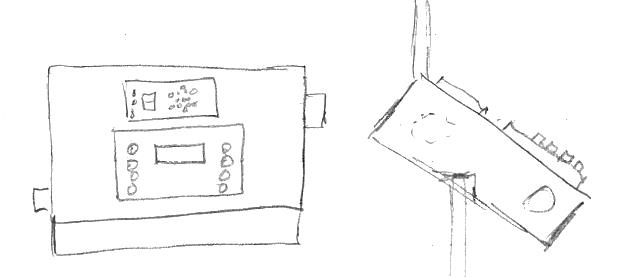
Inspired by Roger's Etherwave-ish RP3, I whipped up a side-by-side LCD & encoders panel in OpenSCAD.  Encoders located below the LCD keeps your hands from obscuring the LCD when twiddling, but makes for an awkward overall layout.


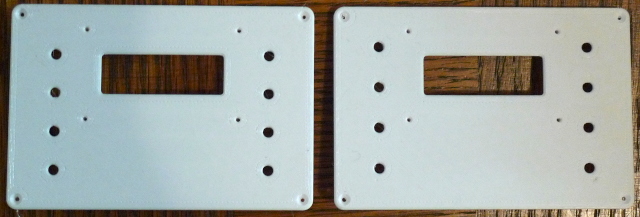
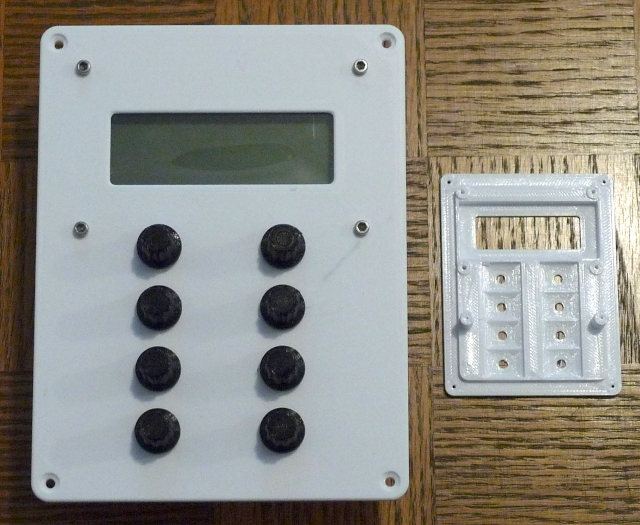
The above were printed 1/2 scale.  Started with the one on the right, where the encoder vertical spacing is maximal and centered on the panel.  Transitioned to the one on the left where the top two encoders are centered on the LCD, which seems like a slight improvement as it moves the top knobs down a bit, though it cramps the knobs up slightly more.  The LCD itself is located by centering the main PWB with the panel both horizontally and vertically.  There is a 10mm overhang all around, and this results in panel dimensions of 185mm x 125mm.


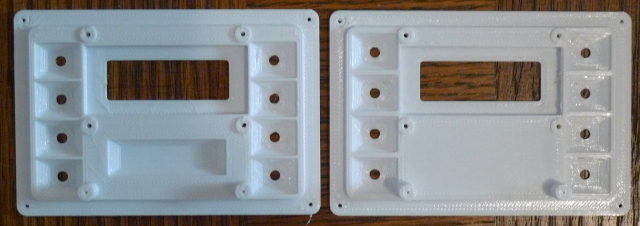
Above is a back view of the half-size panels, showing the mounting PWB posts and encoder cutouts.  The front panel is 5mm thick, the back panel area is also 5mm thick, making it 10mm max.  I carved out a spot for some optional extra front controls under the LCD and vertically centered it on the lower two encoders.


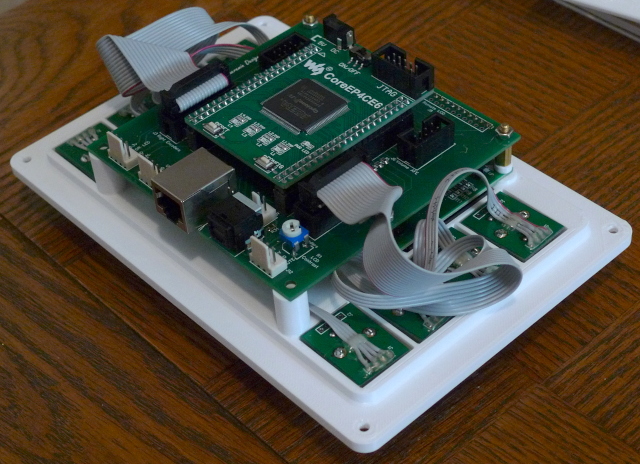
Above the main PWB, LCD, and encoder boards (ripped from P2) have been added.  Note that the encoder PWBs actually end up being recessed below the back.


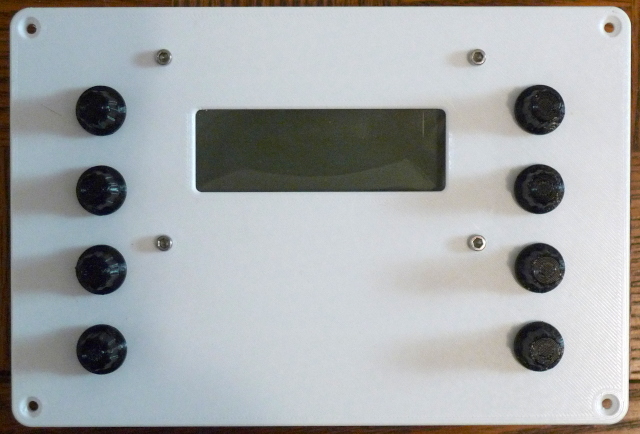
Above is a front view, with new printed black knobs.  The LCD weirdness is the clear protective plastic that I haven't bothered to remove yet.

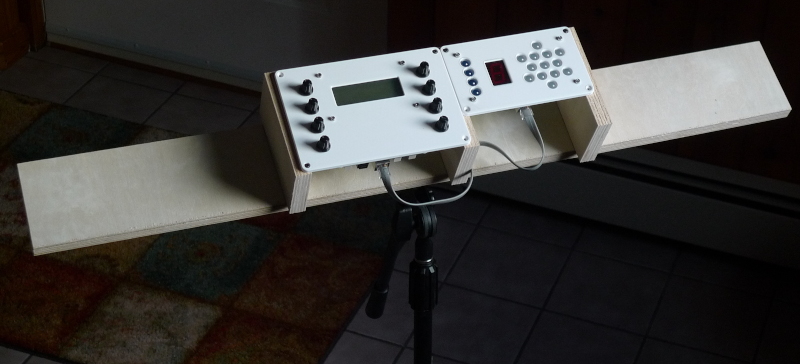
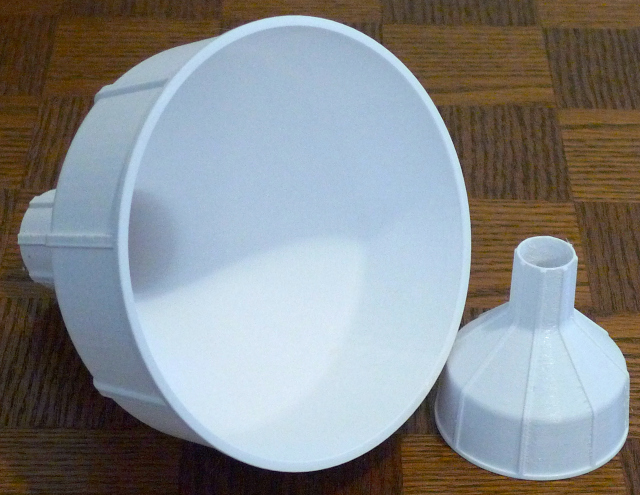
Next up: printing a tuner panel and getting everything on one plank of wood.  My aim is to use a boom mic stand to get the angle from a simple square box, rather than from a more complex angled panel box.  Thinking of identical left and right printed horizontal antenna mounts, much like Roger is using for his volume antenna.

One could, I suppose, design a tiny LED tuner PWB and stick it below the LCD, making an entirely ambidextrous setup (though beware the enticing side goal).

Panelizing things creates very handy sub-units, and enables one to use an otherwise sealed wooden box for the enclosure, as the panels provide plenty of access.  But finishing the panels so they don't look obviously printed is the rub.

If you ever get into the prototyping biz (god help you) make sure you have at least two copies of the guts - one to use full time, the other to play around with.

Posted: 1/21/2021 11:57:59 PM
Channel Road Amps

From: Lopez Island, WA

Joined: 11/25/2014

[knobs from Tayda Electronics]: I didn't see any that were super appropriate for encoders (no pointer).  They certainly have nice prices and I'll keep them in mind!

The ones I happened to have on hand were these:  Knob DAVIES 1900H CLONE Cream.  They're about 0.5" in diameter and they do have a pointer.  Tayda has them in lots of different colors, which you can find by searching for "davies 1900h" on their website.  These knobs don't have a brass insert, but they seem to be holding up OK.

Posted: 1/22/2021 3:06:28 PM
dewster

From: Northern NJ, USA

Joined: 2/17/2012

"The ones I happened to have on hand were these:  Knob DAVIES 1900H CLONE Cream.  They're about 0.5" in diameter and they do have a pointer.  Tayda has them in lots of different colors, which you can find by searching for "davies 1900h" on their website.  These knobs don't have a brass insert, but they seem to be holding up OK."  - Channel Road Amps

Since I started 3D printing my slip-on knobs I haven't had a single ESD event disrupting the D-Lev software. 

The setscrew on the communication knobs I was previously using (similar to this but black: https://www.taydaelectronics.com/potentiometer-variable-resistors/knobs/kn8f-knob-blue.html) seems to have been a major route for this to happen.

Posted: 1/23/2021 4:04:08 PM
dewster

From: Northern NJ, USA

Joined: 2/17/2012

P4 Musings

Yesterday I mounted the new LCD & endcoders plate and a freshly printed LED tuner plate on some scrap plywood.  I probably shouldn't comment until it's up and running, but I'm not sure if I'll keep going with this configuration.  This isn't me condemning the whole idea, just some observations so far.

1. I think the boom mike stand thing is dead for me as a viable mount.  The extra rotational freedom of movement means you need something like a bubble level to know when it's not tilted - indeed I routinely use a small carpenter's level on P3 to align it vertically after bumping or moving or adjusting it.  To get the desired fixed angle one could either build a flat bottom / slanted top enclosure like Roger is doing, or build a fixed angle into the bottom mount.  I'm tending toward the latter because a square box is easy to build, and presents a more uniform internal volume that might better accommodate the guts.

2. When standing at it and addressing it as if to play, I think I'd end up hanging out somewhat to the left of it, which would place the tuner significantly to the right, facing me rather obliquely.  Traditional Theremin players, who are accustomed to a pitch rod and high pitch field sensitivity, likely have to watch the pitch side much more closely than I do, so placing the tuner over there for them makes more sense I suppose.  I could probably adapt to it, but it feels a bit too non-ideal for me.

3. There is wasted front panel space below the LCD and below the LED tuner plate.  No law that says it all needs to be utilized, but it looks a bit blank.

For a simple box enclosure, the T-vox tour feels closer to how I'm thinking now.  More depth from front to back, with the tuner placed above the controls rather than to the right, centering it and giving it more height.  The volume antenna could be mounted closer, the pitch antenna definitely farther back:

To minimize magnetic interaction, since the 2mH volume coil is physically larger it could be mounted front to back, with the smaller 1mH pitch coil mounted side-to-side.  It's a real luxury not having to worry about the guts perturbing things, something I didn't think was possible with ultra sensitive C fields calling all the shots / running the show.

Posted: 1/25/2021 7:06:25 PM
dewster

From: Northern NJ, USA

Joined: 2/17/2012

C-Sensors

I've been reading (mostly re-reading, actually) various C-sensor papers, and virtually all mention the plate area as being the main factor in SNR / distance of measurement, which I've seen directly via rod / plate experiments, and indirectly via FEA.  At this point I don't think anything can push me over into the rod antenna camp.  Sensing bodies moving around in a room is a similar problem to the Theremin, though one can average for a lot longer and so get away with RC instead of LC, and figuring out what's going on in the room with multiple bodies and multiple sensors is an interesting scenario for automated data interpretation / extraction.  I'm still not entirely clear on what makes for a stable oscillator, though LC oscillates all by itself which certainly helps, as does the voltage boost when sensing longer distances in a timely fashion.

One of the main paths forward with digital Theremins is a 2-axis expression hand in place of the simple volume hand, so this is my main motivation for continued research.  Moving to a cheap 32 bit processor would be another direction to go, perhaps using my latest analog 8xistor oscillator for each axis, though I'm not sure how to handle 8 encoders and proper frequency / period measurement even if given high res PWM I/O (so I'm keeping an eye on Vadim's exploits!).  I wish the bottom would fall out of the low end FPGA market like it has for the low end processor market.  Perhaps now that the Chinese are designing and producing them it will break up the Xilinx / Intel (Altera) monopoly.

Posted: 2/1/2021 8:40:47 PM
dewster

From: Northern NJ, USA

Joined: 2/17/2012

Minimal Vertical Faceplate

Been working on the D-Lev SW again.  Roger pointed out a slow phase offset issue when the oscillators are used in a certain way and I believe that's more or less resolved.  Am currently taking a fresh look at pitch correction and have some ideas to hopefully improve that.

Liking the way my previous side-by-side LCD & encoders faceplate came out, I printed a minimalist vertical version:

The full size built-up version is on the left, a reverse view of a 1/2 size proof is on the right.  The encoders are vertically spaced as tight as Roger's PWBs will allow, and double this dimension is used to space them horizontally.  I think they're a bit tight vertically, but still quite usable if you spin them with your thumb directly to the left and your index finger vertical on the right.  Doing this on the side-by-side panel for the left column of knobs actually feels slightly more awkward for me. The plan for P4 is for the tuner to go directly above this.

A couple of my P3 encoders are flaking out, I see that Bourns of all places (all things Theremin?) makes some models that are rated for 100k cycles and don't cost too much.  Gotta dump these el-cheeso eBay junkers.

============

OT, but as part of some HVAC work (don't ask) I found myself designing and printing a funnel to fit in the top of a 5 gallon water cooler type bottle:

The funnel is fully parameterized in openSCAD, and for some crazy reason is one of the coolest & funnest things I've ever printed (as a final product; it's a bore to watch it print).  Again 1/2 size proof of concept on the right, full size on the left.  [FILE].  The ribs form equalizing air passages, and do double duty as reinforcements of the otherwise 1.6mm thick walls.  I hit it just right in the slicer (50% concentric fill IIRC) and there was virtually no retraction or spiderwebbing.  Fits the water bottle like it was made for it - because it was! ;-)  It's stupid basic stuff like this turning out well that restores your faith in printing.

Posted: 2/3/2021 9:55:48 AM
pitts8rh

From: Minnesota USA

Joined: 11/27/2015

I tried some of these grippy silicone caps for use as small-diameter knobs on a really compact test panel that I tried out:

https://www.ebay.com/ipp/254292999101?transactionId=2732500911015&_trksid=p2047675.l48352

I think they feel great for these encoders and I like that they aren't slippery like small plastic knobs.  The only downside that I saw is that they need to be wiped off from time to time because they do tend to show soil from your hands like all soft rubbers and plastics do. They also need to be shortened, but for the split/knurled encoder and pot shafts they fit perfectly (not for flatted shafts). The OD is a little under 3/8".

I've also noticed that you can tolerate much closer knob spacing in vertical columns if instead of grabbing them with your thumb and index finger tip you sort of roll them between your thumb and the side of your index finger.  Eurorack module designers/users seem to accept that it's more important to fit the knobs in the space than it is to adhere to ideal ergonomic spacings.  I think what you have done on your panel above is fine, and I may tighten up the encoder spacing on the new board from its current 1" to a little less.  Some of these arrangements may feel a little awkward at first coming from something else but in most cases it only takes a short time to adapt. 

You must be logged in to post a reply. Please log in or register for a new account.