Simplified Field Setup Instructions
The D-Lev field adjustments can be daunting at first, as there are many more options than Thereminists are usually presented with. So I made some pitch field setup images that will end up in the manual, and would like to present them here first. The pitch field knobs are presented in the order they should be adjusted, but the following applies equally to the volume field as the knobs and internal processing are virtually identical. Captions are beneath the images.
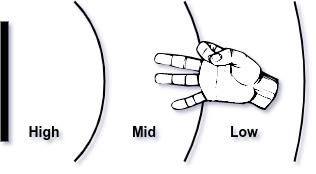
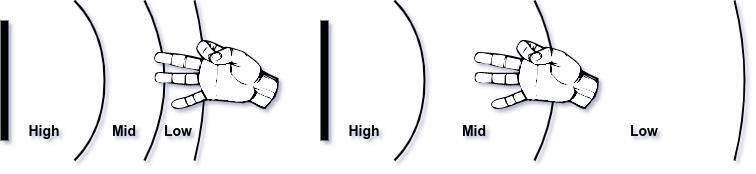
The goal: high, mid, and low pitch sections equally sized and correctly located in the pitch field.
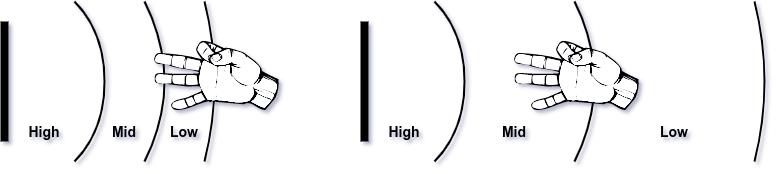
Left: The Pcal knob is set too low, compressing the lower pitch sections. Right: The Pcal knob is set too high, expanding the lower pitch sections.
The Pcal knob is just like the pitch null knob on an analog Theremin, and so is naturally the most critical adjustment in terms of field linearity. It affects the far field the most, the mid field some, and the near field very little. To set Pcal, compare open/closed hand gestures in the near and far fields, and adjust Pcal until you get the same number of note steps on the LED tuner.
When you perform an ACAL, an internal offset is calculated and combined with Pcal - and Pcal is the only input influenced by the ACAL process!
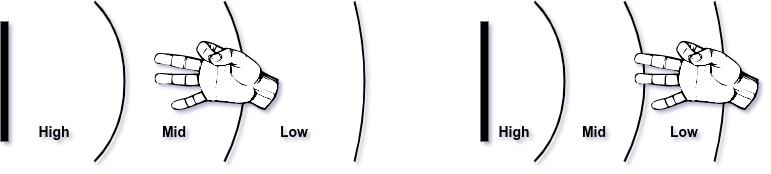
Left: A lower setting of the Sens knob. Right: A higher setting of the Sens knob.
The Sens knob controls the sensitivity, or overall note spacing of the field. Adjust the knob until you feel comfortable with the note spacing, which you can observe directly on the LED tuner. In particular, if you have played an analog Theremin for a long time and have developed an elaborate fingering technique, appropriate adjustment of the Sens knob will enable you to more quickly adapt to the D-Lev pitch field.
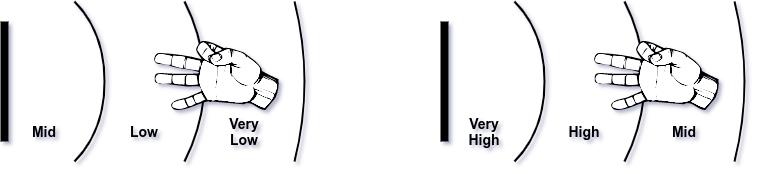
Left: The Ofs+ knob is set too low, shifting all pitches too close to the antenna. Right: The Ofs+ knob is set too high, shifting them too far away.
The Ofs+ knob shifts the entire pitch field. If you find yourself reaching for the oct knob and consistently turning it in one direction a lot, you should instead adjust the Ofs+ knob to better locate the pitches in the field. Proper adjustment of this knob will also help you to feel more comfortable playing the D-Lev.
Keep in mind that the near field is the "sweet spot" in terms of responding mainly to your hand capacitance, and less to your body's capacitance as well as to other external interference. This region is also the least dependent on Pcal and the ACAL process. And on the D-Lev this region isn't non-linear like on most analog Theremins. For all of these reasons I recommend you set up the pitch field so that you generally play nearer to the pitch antenna than farther from it. Not as sexy to watch unfortunately, but you will have better pitch control.
(For simplicity, the Lin and Ofs- knobs weren't discussed here. Please see their descriptions - as well as more detailed field setup instructions - in the manual.)