Build Project: A Moog Melodia Replica

Posted: 10/20/2018 11:34:48 PM
pitts8rh

From: Minnesota USA

Joined: 11/27/2015

Why?

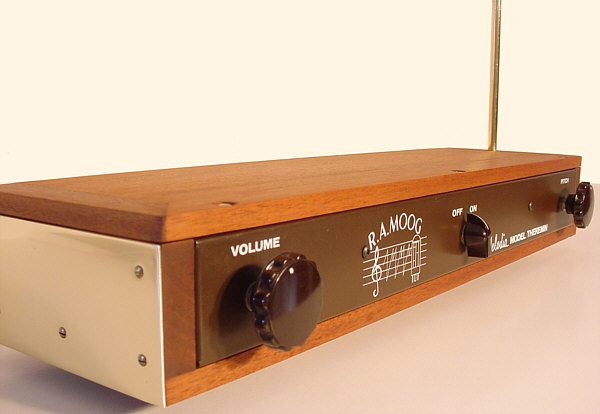
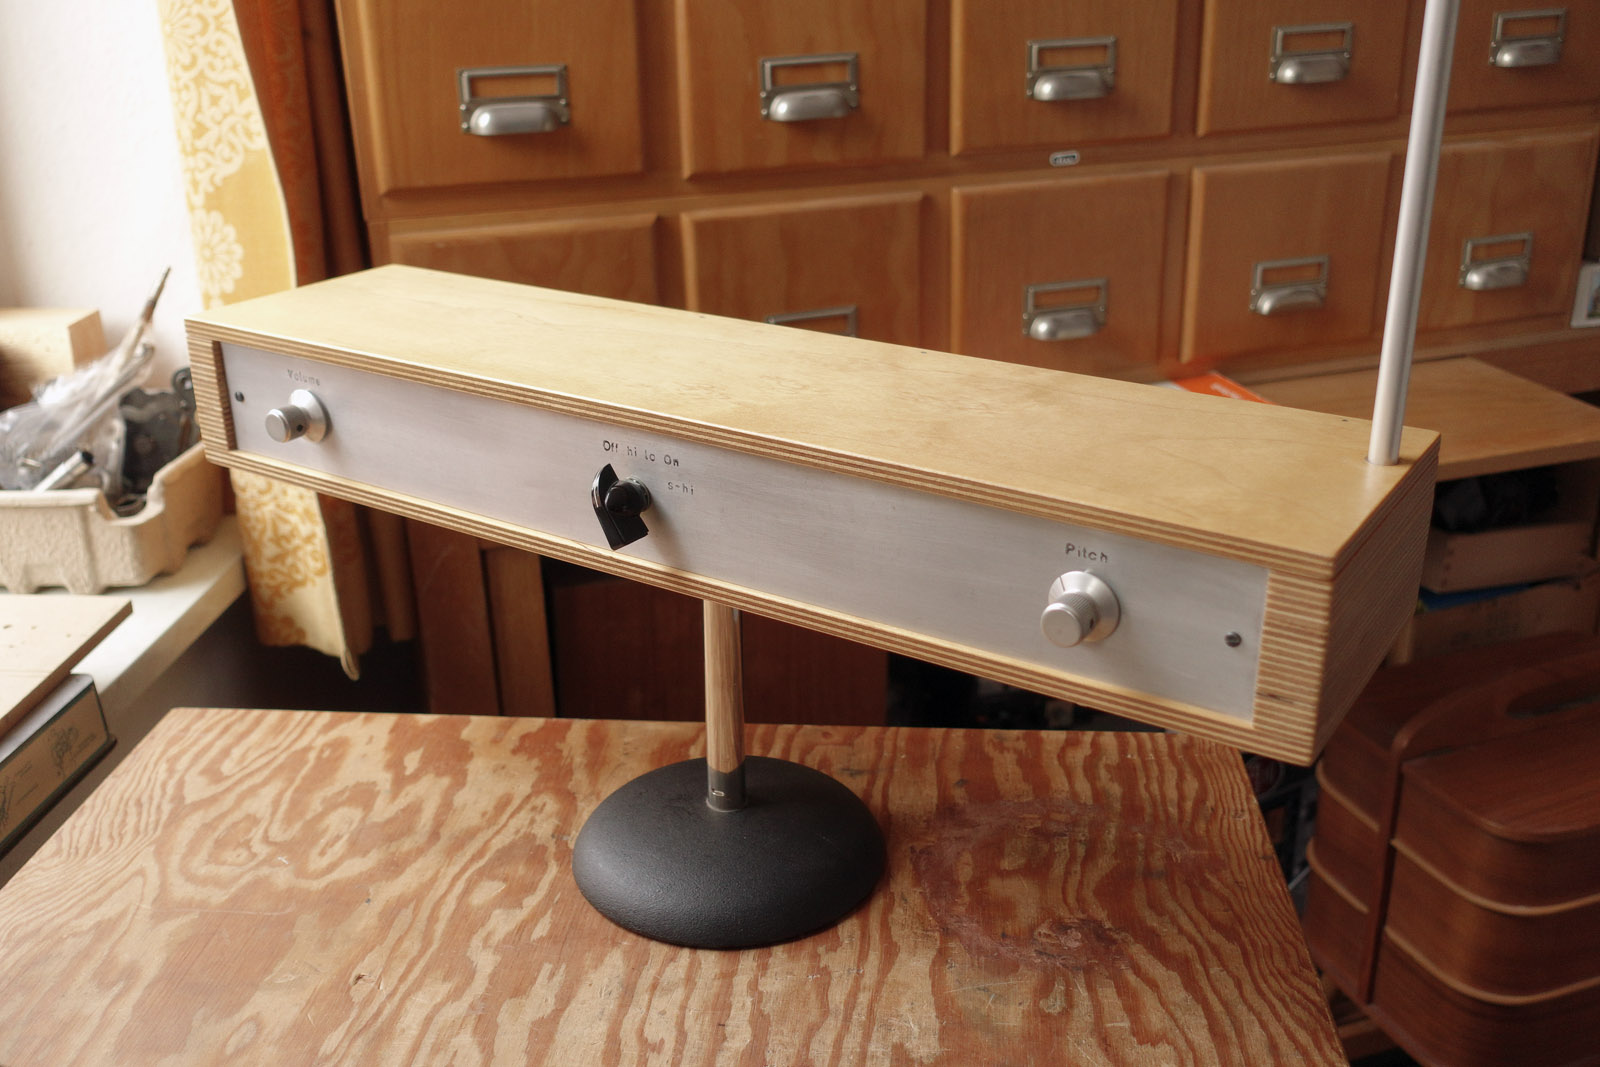
I don't know why I became fascinated with the Moog Melodia enough to want to build a replica.  The physical appearance is very basic, and it has no timbre control, so you're stuck with a single voice.  Part of the motivation for the project is that I enjoy doing restorations and have a great appreciation for the craftsmanship of antique and vintage items.  I also enjoy building from scratch, especially if the project has a nice mix of woodwork, metalwork, and electronics. With the Moog Melodia, I have all three.  I have no expectation that this is going to be a great theremin, but it will be fun to try something different.

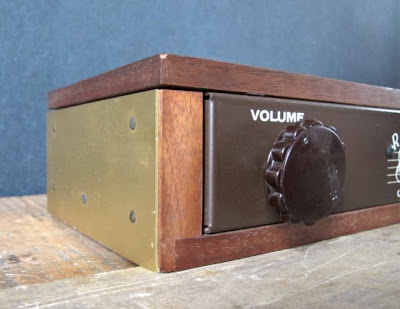
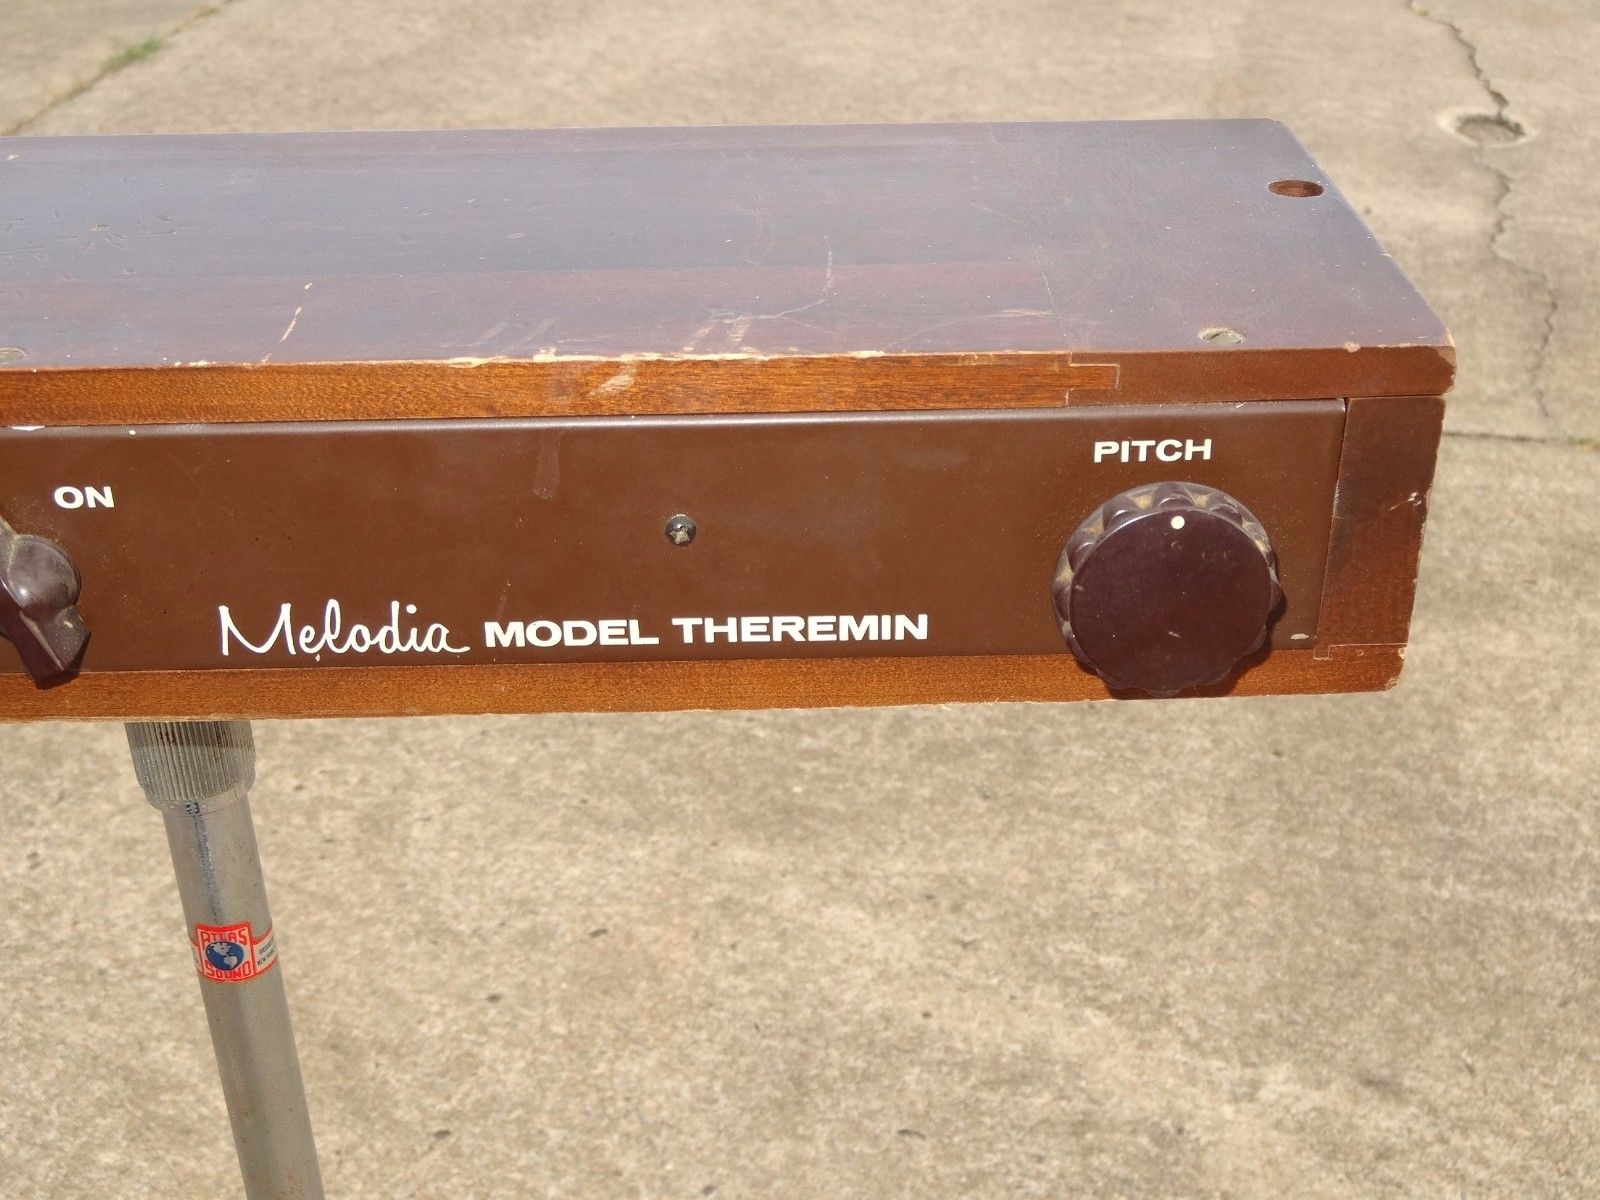
I think the fact that the Melodia is well-documented helped to keep the scope of the project down to something that I was willing to do alongside other projects that are also competing for time. Both the original kit manual and the 1961 Electronics World articles are available (though they are slightly different designs), and there are quite a few photos on the net of various cabinet styles and several good internal construction views.  Attempting to accurately replicate something from photographs by scaling in Photoshop is sometimes tedious, and I find that I'm always second-guessing my decisions and interpretations along the way.  With the help of some additional detailed information from forum member Senior Falcon, the resident Melodia expert, I was able to skip the usual guesswork stage of the project and get on with the fabrication. 

My plan is to build a replica of the model available from Moog in kit or factory-built versions.  These were PNP transistor-based, whereas the 1961 magazine article described an NPN version that was essentially the same except for the transistors and the different biasing that they required.

But before committing to this project I needed to know whether I could buy or replicate some key vintage components, and once I found the original 2N414 PNP germanium transistors and similarly shaped knobs for the front panel, I figured the rest could be faked.  While waiting for parts for another project I have been able to put in a few days effort getting started on some of the most worrisome portions of the Melodia, and with those behind me I'll be off on something else for a while.  Progress photos will be posted here, and once it is completed I will probably write a more detailed complete website article - I don't like protracted serial dramas on the website. 

Construction:

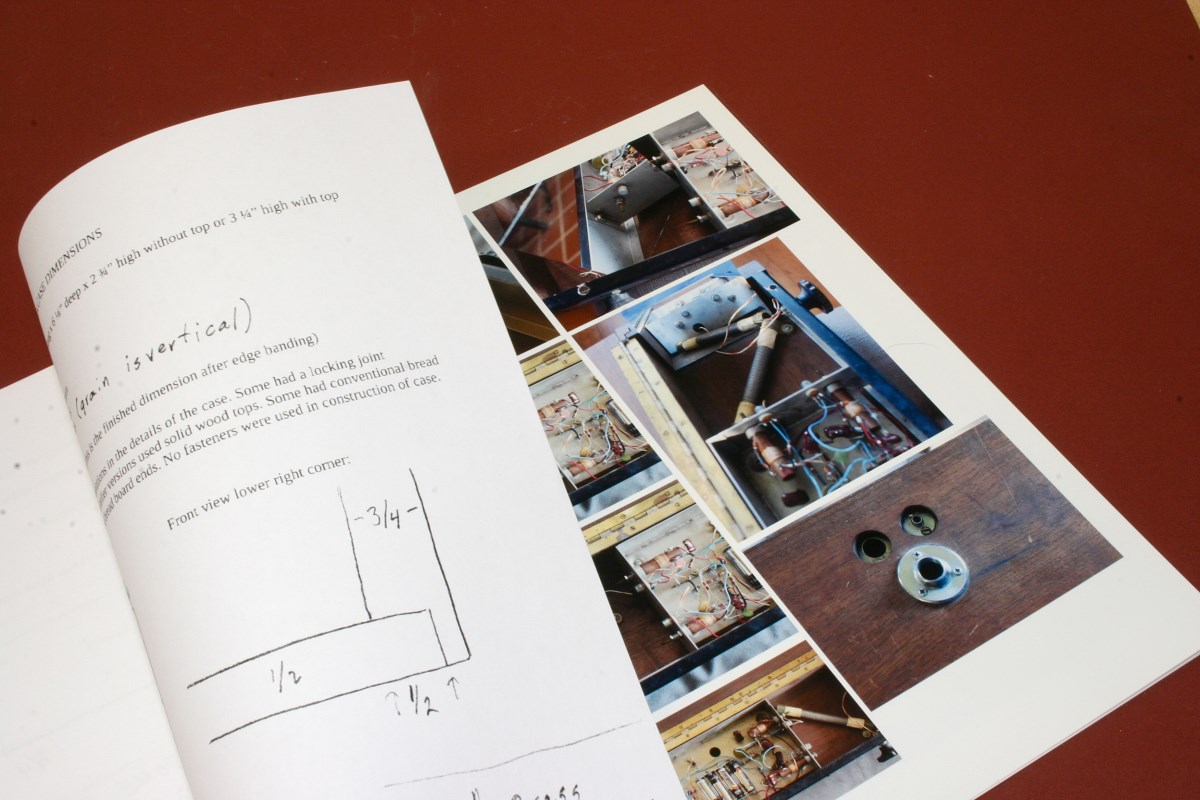
The first order of business was to assemble all of the drawings, forum posts, and compilations of key photos that I could find on the internet into a reference manual for use in my workshop.  I still prefer paper copies instead of tablets or laptops when I'm working around machines.

 
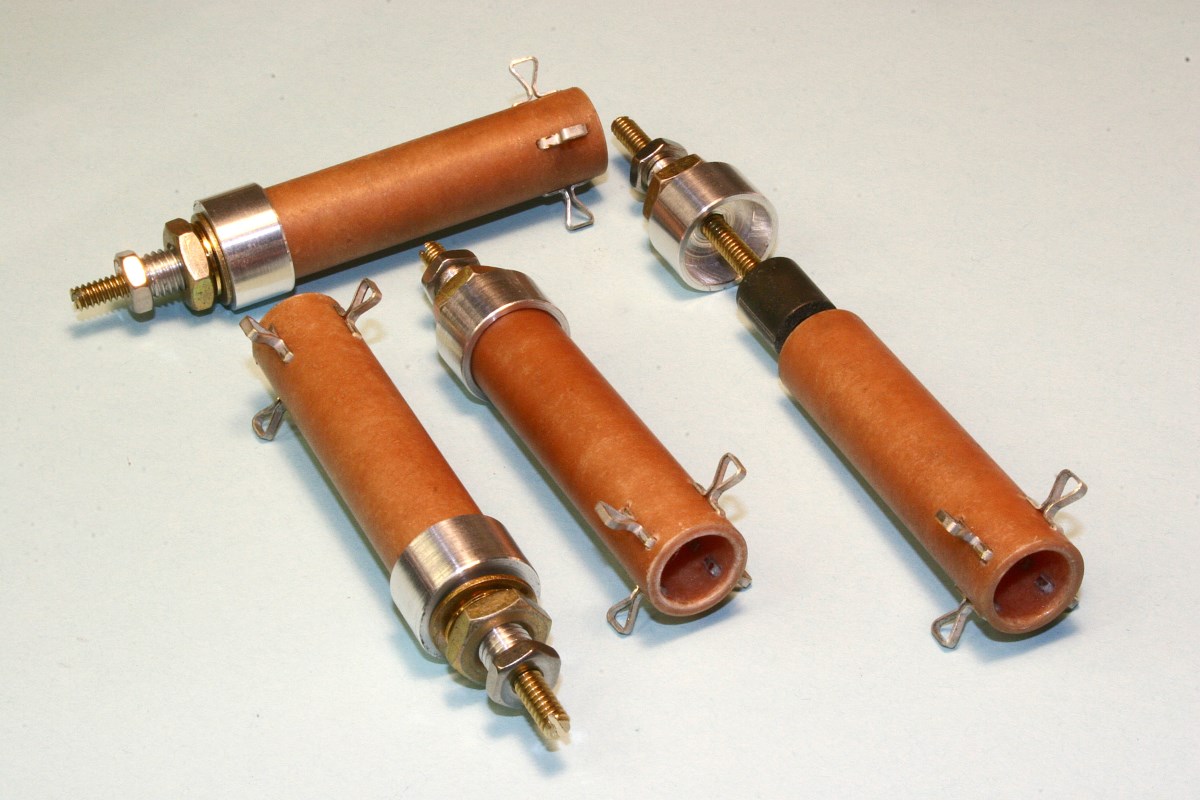
The most important components that needed to be found or made were the tunable inductor coil forms.  I believe that I had read a post by forum member Fat Bob that described similar coil forms that were still available from Surplus Sales of Nebraska.  They did have the coil forms (actually coils, they already had windings on them that needed to be removed), although they were a slightly different style from those in the production Melodia, and I chose not to buy them.  Surplus Sales has an amazing inventory of unique and vintage items that are not available anywhere else, often at amazing (not in a good way) prices.

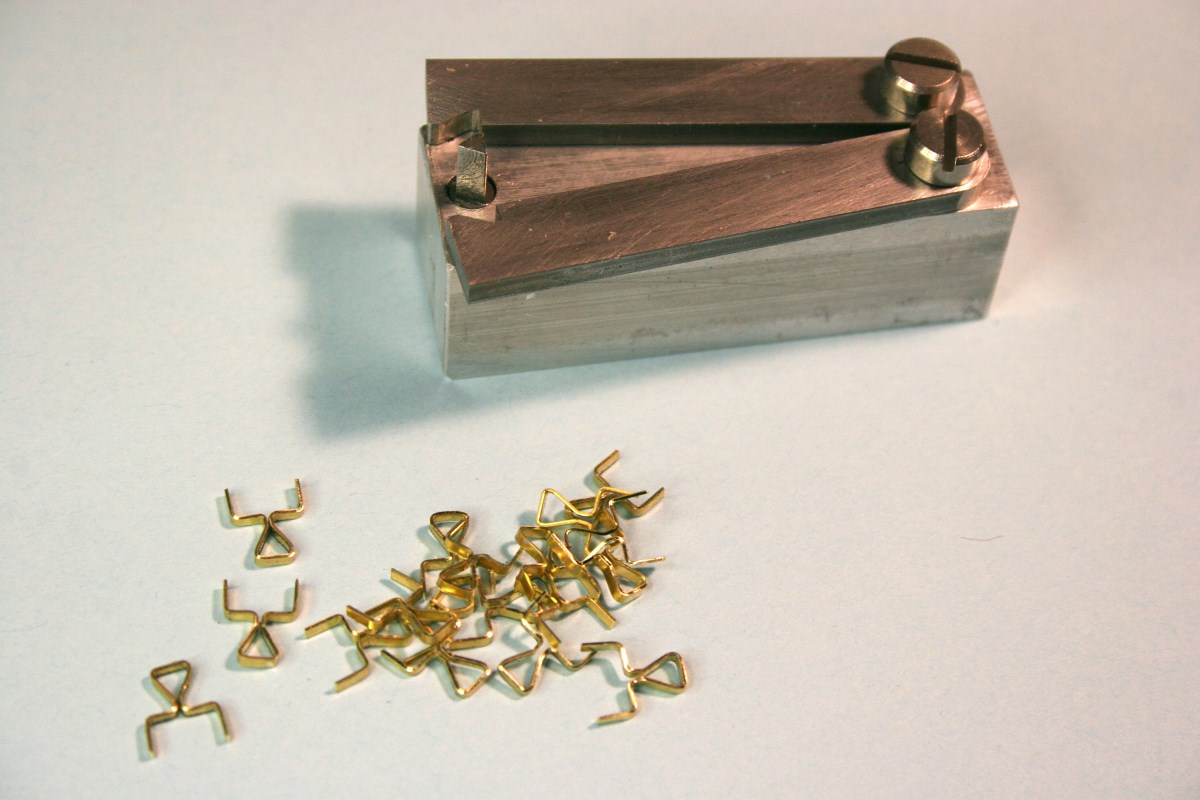
I made the coil forms shown below using 1/2" phenolic tube purchased from McMaster.com.  I also made a tool shown in the second photo to help fabricate the triangular solder lugs from .025" brass, and the threaded caps were machined from aluminum.  The ferrites that I chose to put on the threaded rods were something I already had, and this will be an unknown.  When I wind the coils, I will be prepared to deviate from the instructions as necessary to work with what I have.  I was originally planning to put together a simple mechanical honeycomb-coil winding machine for these inductors, although the progressive-universal wind used on the large antenna ferrites can't be applied this way, and I may have try to adapt a CNC-control machine to wind both types.


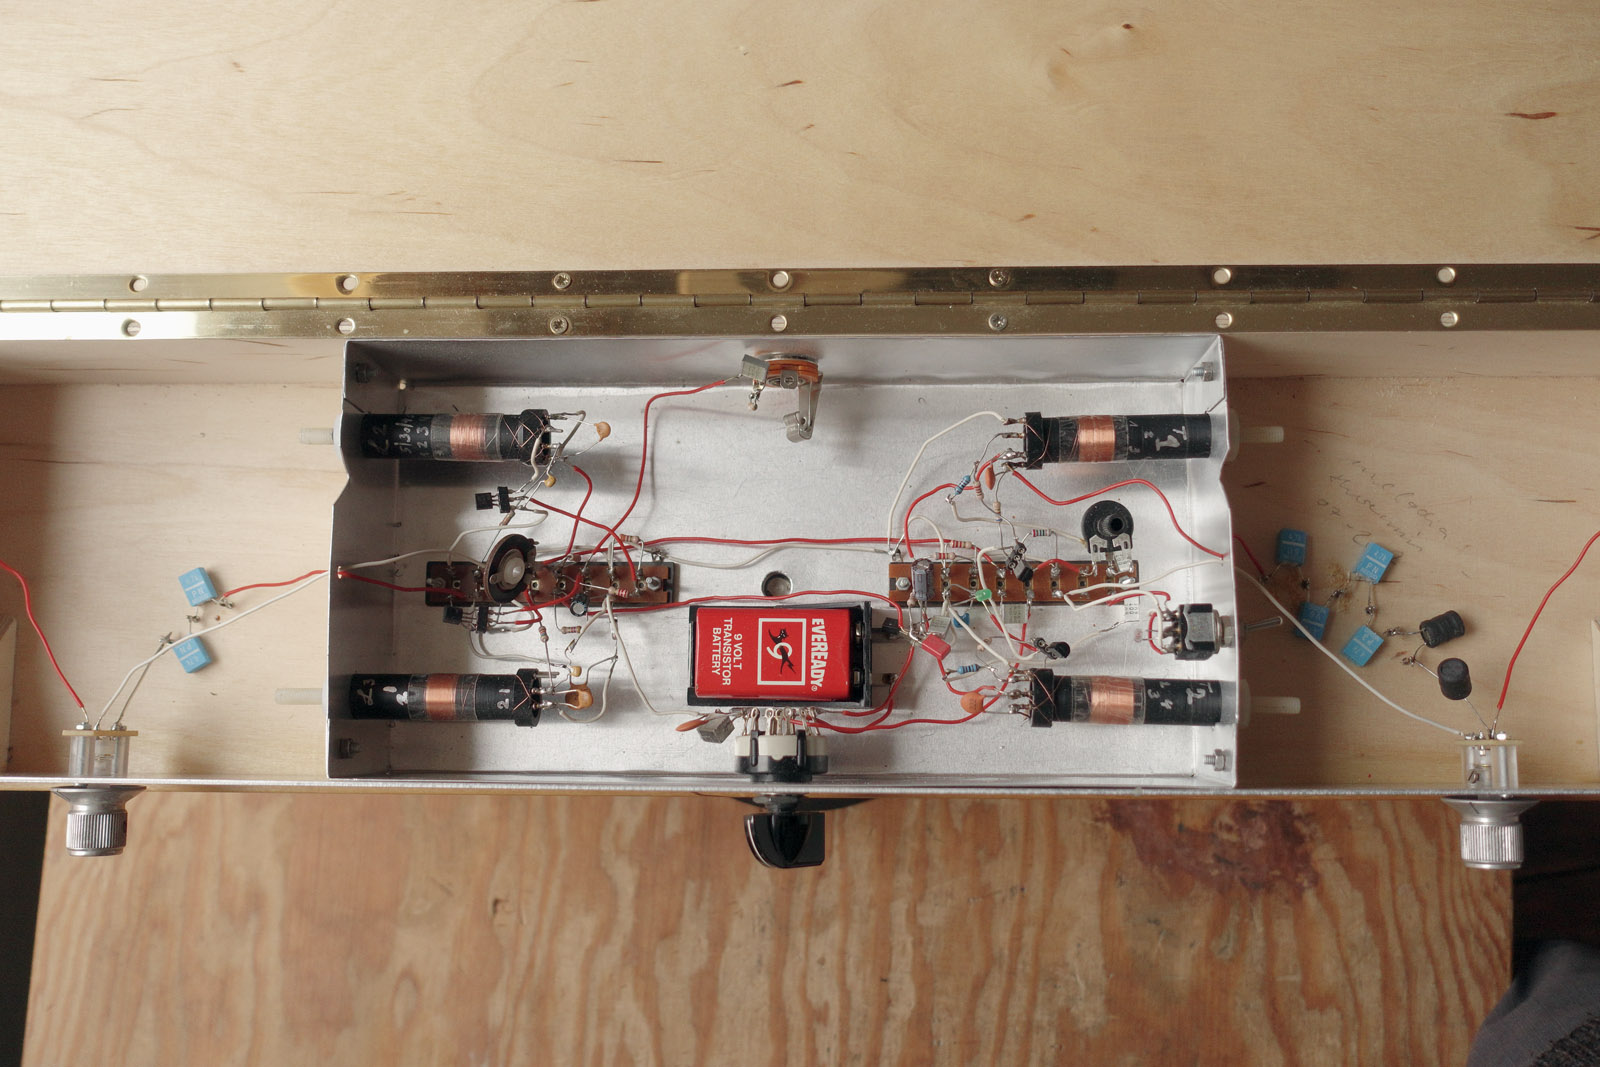
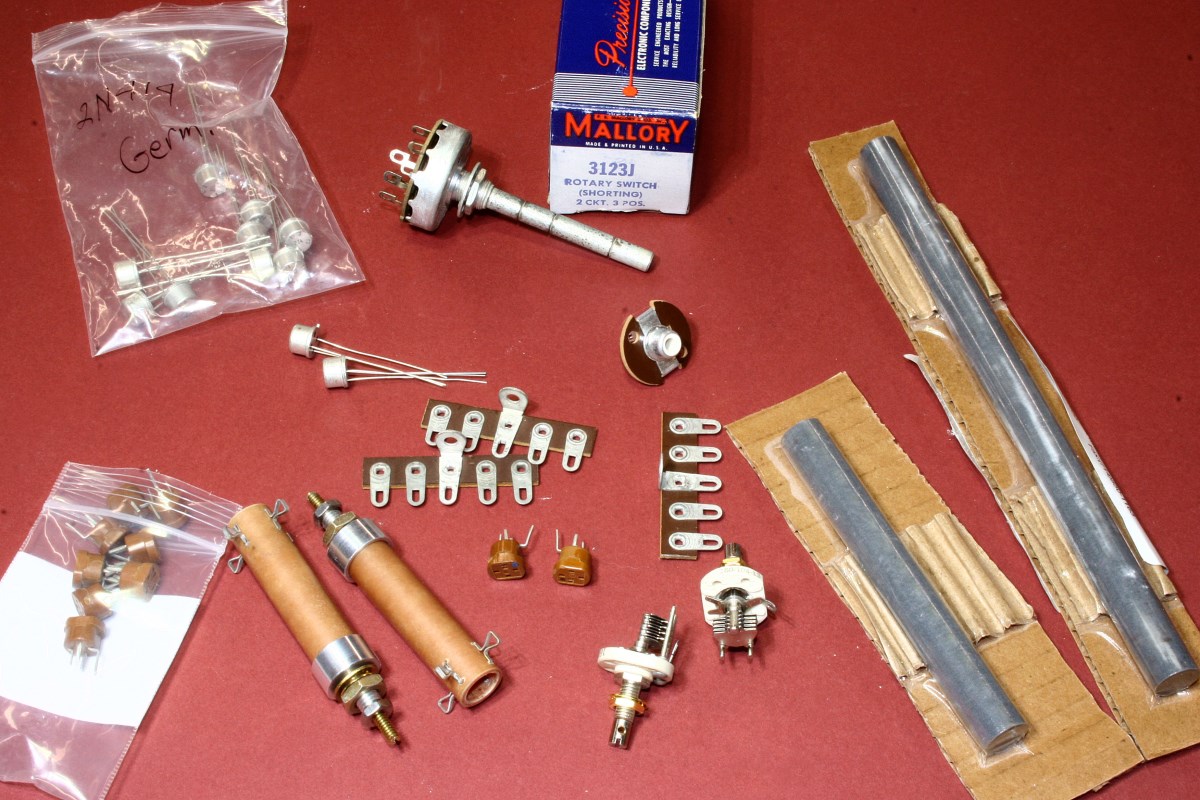
With the coil forms made I started collecting other vintage electronic components  that were on the factory kit's parts list.  The unusual 3-position Mallory rotary power switch shorts the audio in the center position to eliminate the thump when powering on or off.  This switch was and still is available from Surplus Sales.  Other parts were found on eBay, usually at pretty hefty prices.  Sharp eyes will note that the variable capacitors are not exactly correct - I can't find the Johnson 5M11 caps that I bought a while back for this project, but I have these that will be essentially the same after I remove some of the breakaway plates.

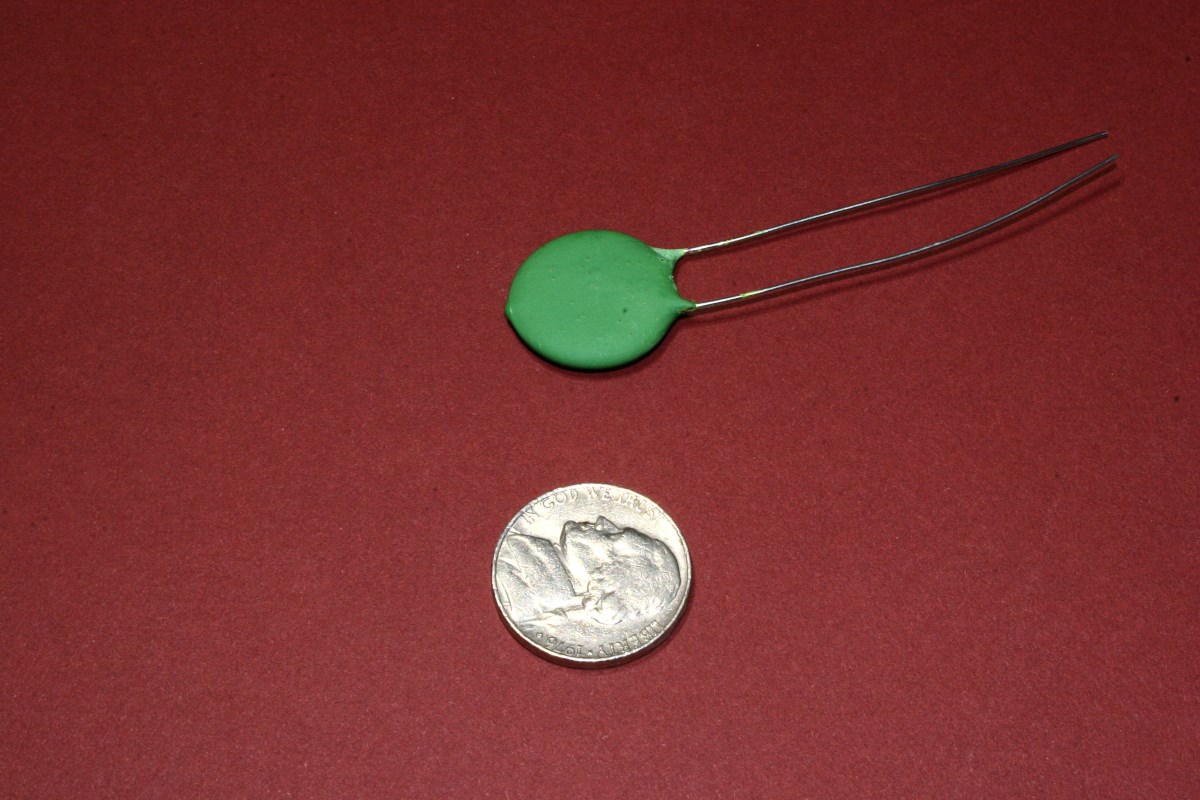
Even little things like disk capacitors are no longer available in the larger values specified.  I had plenty of chip capacitors of the correct values lying around, but how would that look when trying to replicate the appearance both inside and out?  The solution was to solder leads on the chip caps and pot them in urethane resin.  And since they were going to be potted, why not make a mold from a real ceramic capacitor and tint the resin to match the old green ceramic?  All that remains is to transfer some text for the capacitor values...

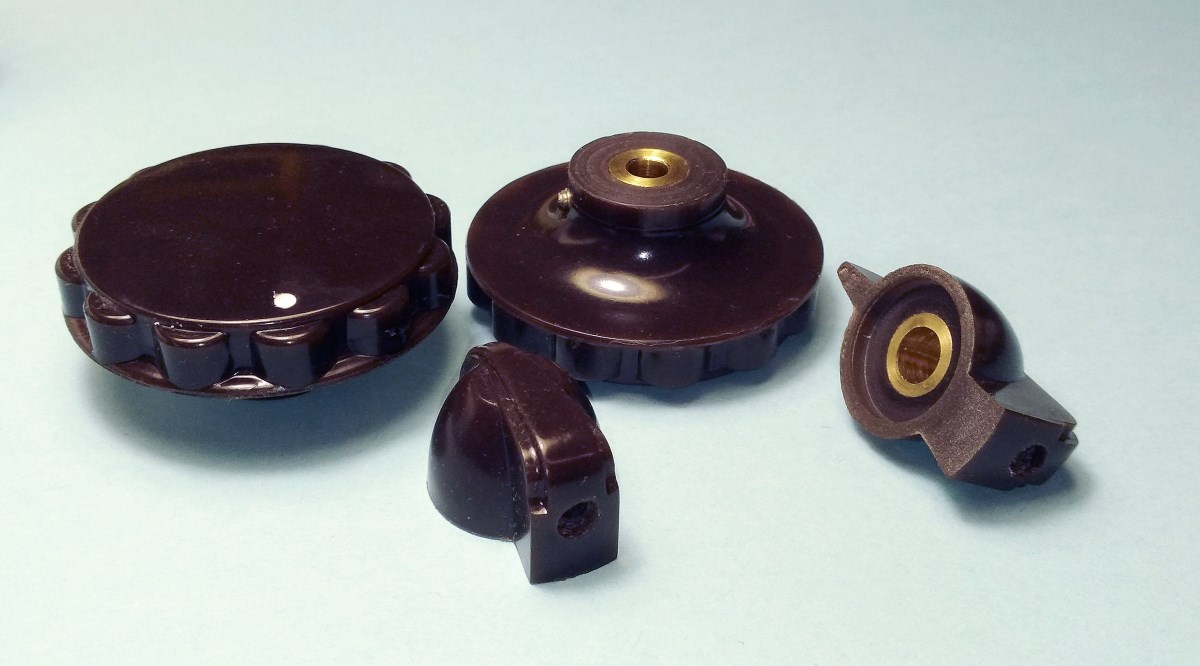
I said earlier that I had found the correct knobs for the pitch and volume controls, and the chicken head knob for the power switch is widely available.  I bought the large knobs as a vintage lot, only to find out that Davies Plastics still sells exactly the same knob for less than I paid on eBay.  But all of these knobs are black, and the originals are brown.  Davies will still make knobs of any color but the minimum is something like 1000 or 2500.

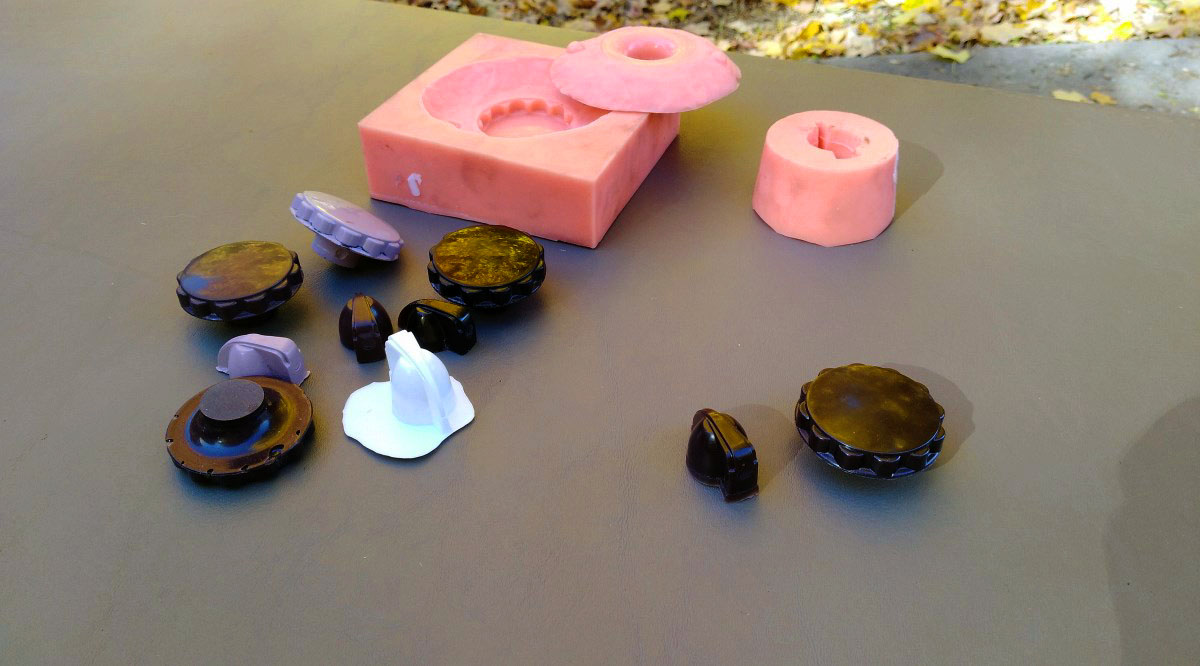
I decided to make molds of the originals and recast them in colored urethane resin.  I had all the materials on hand, and these would be simple to do.  Or so I thought...

Every time, and I mean every time over the years when I have to cast something new I always start out trying to take shortcuts in the process.  In this case I tried to make the silicone molds or urethane casts at atmospheric pressure, and this resulted in failures of both and a lot of wasted materials.  I got frustrated and started all over- the silicone was vacuum degassed, poured around the part, degassed again, then cured under pressure at 60psi.  With a good mold in hand, the tinted urethane resin was mixed, degassed, poured in the mold, degassed again, and then cured under 60psi pressure.  Curing time for the urethane part alone is about 4 hours, so this is a multi-day process.  But after doing this, the yield was 100%. 

The photo below shows good molds in the background, an assortment of failures and color tests on the left, and two perfect casts on the right.  Fixturing the knobs to machine for brass inserts was another challenge, but I won't go into that.

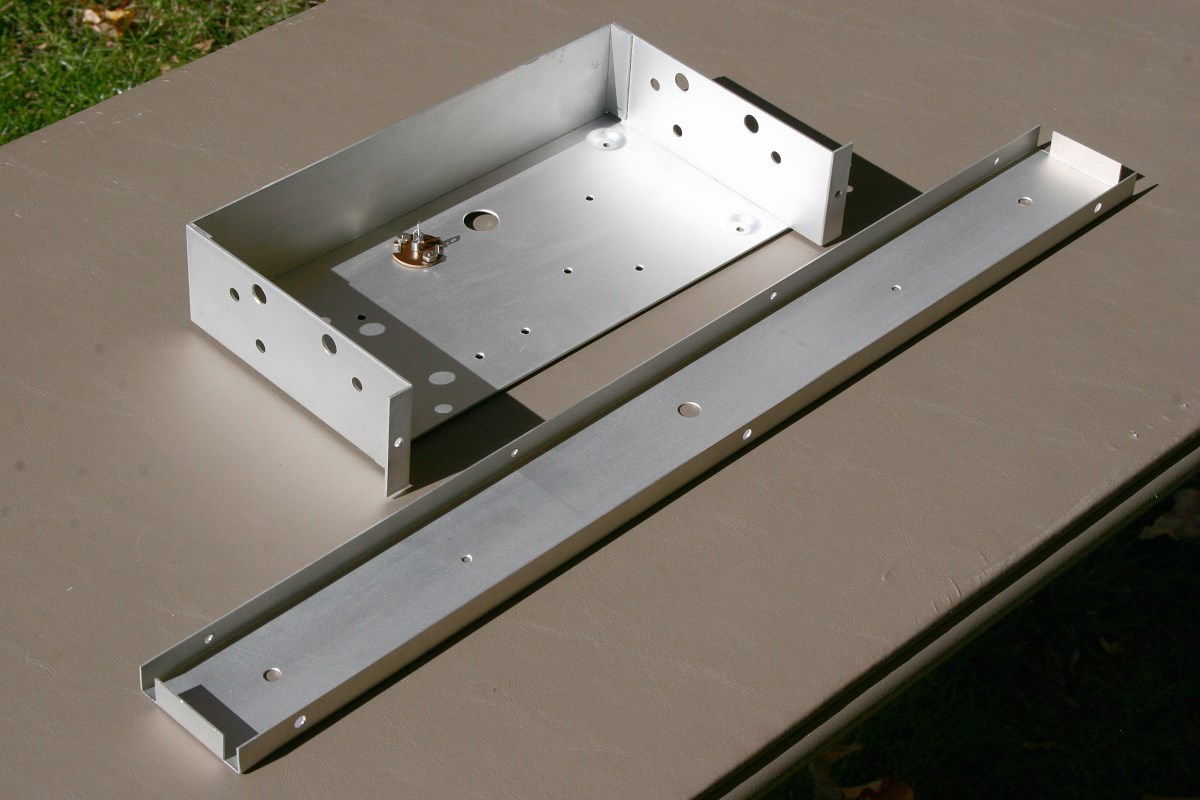
I formed the metal chassis and front panel from 5052 aluminum in accordance with the sketches provided by Senior Falcon and by scaling some dimensions from photos. I made a couple of mistakes, and the pin jack holes are left undersized because I don't know what I'll use there.

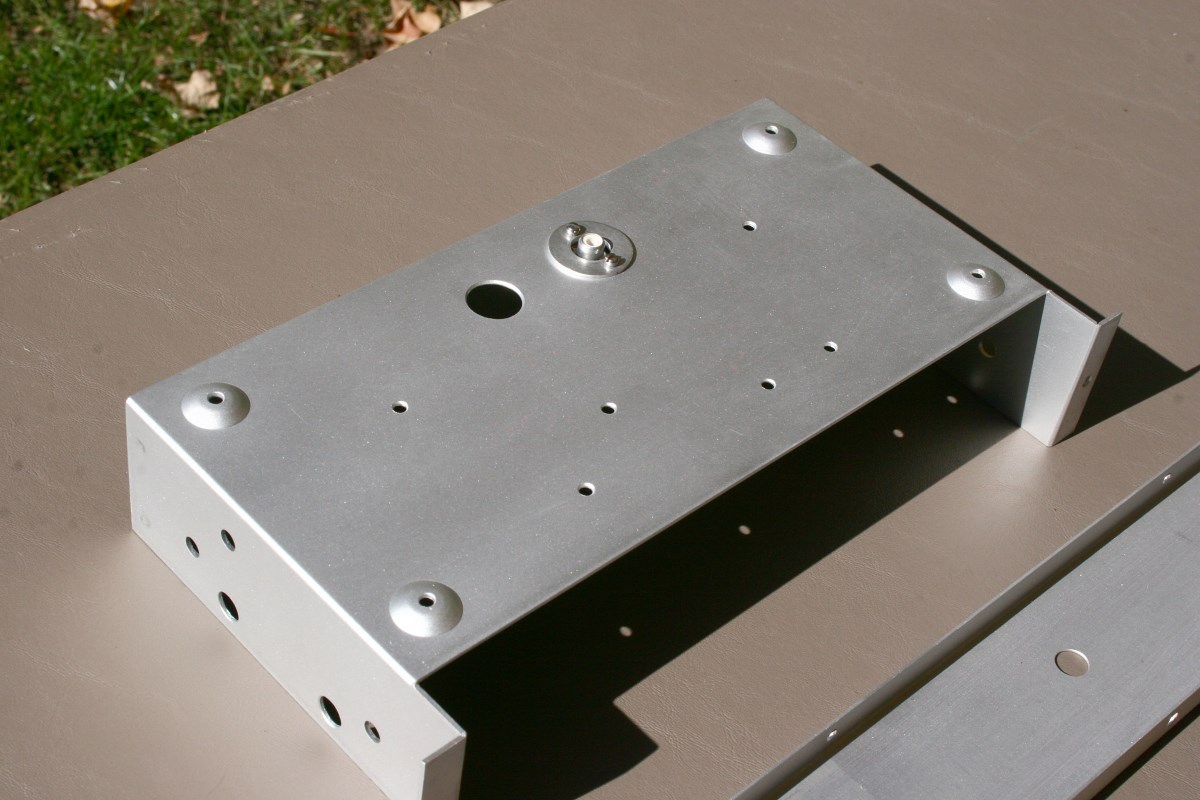
The metal was so ductile that I thought I would try to make a simple die to form the 1/8" dimples that the later chassis design had to provide space underneath for protruding hardware.  After a few failed attempts on samples, I ended up with a die that worked, and I'm very happy with the results.  The second photo shows the formed feet.

Finally, to wrap up this post for now, I have a picture of two different woods that could be used for the cabinet.  Some cabinets were originally walnut, but others do appear to be something lighter - mahogany or possibly even cherry, either of which I would prefer over the darker walnut.  The wood on the lower right is Sipo, a mahogany substitute that has some nice striping.  The wood on the upper left is Brazilian Cherry - very dense and also striped.  It's almost indistinguishable from the Sipo when placed side by side, at least for now.

If anyone has a Melodia made from something other than walnut, or knows about other woods that were used, I would welcome your comments.

More in later weeks...

Posted: 10/21/2018 2:42:26 AM
dewster

From: Northern NJ, USA

Joined: 2/17/2012

Roger, you are a fabricating fiend!  Coil forms, molded knobs (!), AL chassis that looks like it just came from some perfect factory.  My hat is off to you.

In the Melodia schematic I see some ceramic caps that are fairly large valued and ridiculously low voltage (e.g. 2.2uF / 3V).  I suppose it's those that you are having trouble sourcing?

Is there any wood that is the one true mahogany?  From my guitar building days (which consisted mostly reading any book / article / catalog I could get my hands on rather than actual building) it seemed there were so many variants and things that appropriated / hijacked the name that there was no there there.

Posted: 10/21/2018 8:32:18 AM
pitts8rh

From: Minnesota USA

Joined: 11/27/2015

Thanks Eric. 

The 2.2uF/3.3v cap was the first cap that I knew was going to be difficult to find, and as it turns out even some of the smaller values were scarce in anything other than the tiny, fine-leaded disk caps that you get from China.  So I molded most of the values used in the Melodia into roughly correct size disks.  In the photo above you can see 2.2, 1.0, 0.47, and 0.1uf values in large- and medium-size disks.

I don't know any of the fine points of wood species, and I don't know if had heard of Sipo before this, or I have and don't remember.  All I have seen from my visits to lumber yards is that many of the "true" mahoganies can me quite plain in appearance and very uniform, which probably explains why they were commonly used for making stable patterns for sand casting in the last century.  My Taylor guitars have mahogany sides (not Sapele), and they are very uniform with no variation in color. 

I am fortunate to have a very good independent lumber store with domestic and exotic hardwoods about a mile from my house in suburbia.  They had the beautiful flame maple that I used for the curved EW pro look-alike case that I made, and I often just grab exceptionally pretty boards of any type when I see them.  The last time I was there they had African mahogany boards in 3" x 12" S2S slabs - you don't often see that sort of thing at the chain woodworking stores.  They even had 2" x 10" slabs of Sitka spruce - for $425!  

Posted: 10/21/2018 1:59:00 PM
senior_falcon

Joined: 10/23/2014

Roger, you are a fabricating fiend!  Coil forms, molded knobs (!), AL chassis that looks like it just came from some perfect factory.  My hat is off to you.In the Melodia schematic I see some ceramic caps that are fairly large valued and ridiculously low voltage (e.g. 2.2uF / 3V).  I suppose it's those that you are having trouble sourcing?Is there any wood that is the one true mahogany?  From my guitar building days (which consisted mostly reading any book / article / catalog I could get my hands on rather than actual building) it seemed there were so many variants and things that appropriated / hijacked the name that there was no there there.

I agree - that is just beautiful work! You even put the dimples in the chassis where it mounts to the case. 

As far as capacitors go, dielectrics have improved a lot over the years which has made smaller packages possible. You might be able to find the same values and dimensions in a higher voltage. (Where I work we have 1.3 mfd capacitors that weight several hundred pounds. The reason for the large size is that they are 100 kV caps.)

There are two kinds of mahogany that are used for lumber:
Swietenia mahagoni is "true mahagany". Also known as Cuban or Jamaican mahogany. Almost totally eradicated in the wild
Swietenia macrophylla is a different species of mahagany. Also known as Central American mahagany or "big leaf" mahogany. Also endangered.
I understand that plantation grown mahogany can be obtained but have heard that it is nothing special because after all the purpose of a plantation is to grow the product as fast as possible.
The rarity is the reason for the plethora of other "mahoganies" on the market. These species resemble mahogany but are not even the same genus.

My experience with wood is that over time and with exposure to sunlight, light woods tend to darken and dark woods tend to get lighter. If you get a piece of black walnut you can test this by blocking part of it from the sun and putting it in a window for a few weeks. You should see that the exposed part is somewhat lighter and warmer in tone.

There are other species of walnut that I believe are lighter than the black walnut we find in the eastern US. English walnut and Claro walnut are possibilities if you can find a small piece.

You choice of finish will also influence how dark the wood becomes. Using a water based polyurethane will not darken the wood as much as an oil based polyurethane or a danish oil finish. ZAR UltraMax waterborne oil modified polyurethane is one good possibility. Another possibility is to put nothing but a few coats of wax on the wood which should keep it even lighter.

Posted: 10/21/2018 5:52:17 PM
pitts8rh

From: Minnesota USA

Joined: 11/27/2015

My brown knobs are all finished with brass inserts and set screws (and white dots).  This operation took a lot longer than expected, but hey... DONE!


"You choice of finish will also influence how dark the wood becomes. Using a water based polyurethane will not darken the wood as much as an oil based polyurethane or a danish oil finish. ZAR UltraMax waterborne oil modified polyurethane is one good possibility. Another possibility is to put nothing but a few coats of wax on the wood which should keep it even lighter."  -senior_falcon

When the time comes I'll run some tests with water-based poly versus non-yellowing lacquer, wax, or whatever else I have to see what happens with the Sipo.  I prefer the lighter look of the mitered-top version in the picture that you sent to me, although either of the woods that I have are bound to come out more red (that's okay).  The lighter wood tone in the picture below gives a little contrast with the brown knobs and brown panel. I'm planning on doing the same mitered top on mine with solid wood throughout, so if I can avoid water-based finish I would rather do so.  But we'll see what comes out the lightest.

Posted: 10/22/2018 3:06:45 AM
senior_falcon

Joined: 10/23/2014

My brown knobs are all finished with brass inserts and set screws (and white dots).  This operation took a lot longer than expected, but hey... DONE! "You choice of finish will also influence how dark the wood becomes. Using a water based polyurethane will not darken the wood as much as an oil based polyurethane or a danish oil finish. ZAR UltraMax waterborne oil modified polyurethane is one good possibility. Another possibility is to put nothing but a few coats of wax on the wood which should keep it even lighter."  -senior_falconWhen the time comes I'll run some tests with water-based poly versus non-yellowing lacquer, wax, or whatever else I have to see what happens with the Sipo.  I prefer the lighter look of the mitered-top version in the picture that you sent to me, although either of the woods that I have are bound to come out more red (that's okay).  The lighter wood tone in the picture below gives a little contrast with the brown knobs and brown panel. I'm planning on doing the same mitered top on mine with solid wood throughout, so if I can avoid water-based finish I would rather do so.  But we'll see what comes out the lightest.

Although it looks brown in the picture above, the front panel is actually painted flat black. Also the "chicken head" on/off knob is a shiny black. The two large knobs are a very dark brown. 

I find it curious that you are going to the trouble to make as exact a copy as possible, even so far as casting new knobs in the right color, but don't want to use the same wood species that was originally used. Here is food for thought from a page on wood finishing.

Matching Old Walnut
As walnut ages its color changes. Matching the cool, charcoal-gray color of new kiln-dried walnut to the mellow mahogany red or amber gold of aged walnut is a challenge faced by anyone who repairs old furniture.
In most cases the new walnut will have to be lightened before adding color with dye. Use two-part wood bleach, available at most hardware and paint stores. This bleach will lighten the walnut without removing all of the reddish tones...

https://www.popularwoodworking.com/projects/tips-for-finishing-walnut/

 I'm patient enough to let the wood age at its own speed, so I've never had occasion to use this type of bleach.If you try this, bleach lightly and stain lightly, rather than bleaching heavily and staining heavily. Too much stain makes the wood look muddy.

Posted: 10/22/2018 10:30:38 AM
pitts8rh

From: Minnesota USA

Joined: 11/27/2015

"I find it curious that you are going to the trouble to make as exact a copy as possible, even so far as casting new knobs in the right color, but don't want to use the same wood species that was originally used. Here is food for thought from a page on wood finishing." - senior_falcon

It should not seem curious at all.

Although I've been a woodworker for a little over 50 years, it's clear that you know a lot more about wood species and traits than I do, and I respect your thoughts on the subject.  I'm going by the best information that I can find, much of which has come from you, and the remainder from any photos that I have been able to find on the internet.  I have never seen a Melodia of any style in person. And I can change any decision at any time right up to the point of making that actual part. I'm making brown knobs because I am sure that the knobs, at least the large ones, are brown.  However, I am considering mahogany for the cabinet because it is in the realm of possibility that it was used in at least some original Melodias. From your previous post on 9/30:

"Most look like walnut to me, although at least one appears to be made of mahogany."  - senior_falcon

After reviewing again all the pictures that I have collected, I agree that most are walnut.  But even the picture above, to me, looks like it is possibly mahogany.

And to this I have to partially disagree:

"Although it looks brown in the picture above, the front panel is actually painted flat black. Also the "chicken head" on/off knob is a shiny black. The two large knobs are a very dark brown." - senior_falcon

I'll concede on the second point that the power knobs are black in most, if not all cases.  But the knob in the last photo below could be interpreted either way, and since brown knobs were common then I don't see why they couldn't at least at one time have been used by the factory.

But I have to disagree on the first point above that the panel in the previous photo, and those I've added below, are black.  I know that your version with the round logo is black, but look at the black screw against the panel in the photos below. That looks like a brown panel, even considering color balance interpretations, but I also could see how the sheen of a black front panel could cause misinterpretation.  However, there are a number of other photos of Melodias that appear to have brown panels under various lighting conditions. And from another of your 9/30 posts:

"The on/off switch is black and the tuning knobs are brown bakelite. Maybe you could paint your black knobs brown? There are photos on this site that show a brown front panel with the vacuum tube logo and in that picture you can see that the on/off switch is black.  My front panel is definitely painted black. There are enough variations in this design to make me suspect that Moog used whatever was handy." - senior_falcon

Panel color is something that I want to get right, so I would appreciate your clarification on this...

It may appear so, but I am not totally OCD about making an absolutely authentic-looking replica, partially because I don't have enough information, even with your excellent drawings, to do that.  I am already planning to mix the newer-style metal chassis with the older staff/tube-logo front panel, and so on.  And on other points like the joinery style that seem to be all over the place, I'll just have to make a call on how I do it.  I do intend to alter the graphics on this remake so that there is no confusion about it being a replica, even though a side-by-side comparison with an original would make that obvious.  I am also sensitive about making something that it can be accused of being a forgery (and that has happened, even when there were clear differences), so there will be deviations here and there, some accidental and some intentional. 

I am still actively seeking all the information that I can find on the originals so that I can pick and choose the favorite attributes that may have been used individually by Moog at one time, though not necessarily all on the same model.

PS: possibly incommunicado for the next 3 days, so I don't know if I can see or respond to any replies until Thursday. Thanks.

Posted: 10/22/2018 12:34:21 PM
senior_falcon

Joined: 10/23/2014

The only thing I know for sure is that my later model Melodia has a black panel. From your post above, the bottom picture has what sure looks like a brown panel. I don't think is just a color balance issue because the screw is definitely blacker than the panel. In the two pictures above that, which are of a different instrument, it looks black to me, but even there you could argue for dark brown because the screw seems darker. I will take some pictures of mine with a light background to see if I can get the black panel to look brown.

In pictures of Moog's 1954 theremins the panel looks black and we know that later versions of the Melodia used a black panel. But it is entirely possible that earlier versions of the Melodia might have used a brown panel.

http://moogarchives.com has some interesting information about earlier theremins.

As far as wood - in the 1954 article he advertises coils for sale and even a "Completely assembled and tested theremin housed in a beautiful hand polished mahogany cabinet." The pictures of the model 201 clearly show ribbon striped african mahagany.

But that was made when Moog lived in Flushing. Up here in the Ithaca area there is a lot of local walnut available which probably would have influenced the type of wood that was chosen.

The website http://nyslandmarks.com is by Roger Luther. I believe he has a number of early Moog theremins, including a Melodia with the vacuum tube logo. If you could contact him he should be able to give a definite answer about panel and knob colors, and the type of wood used on the earlier Melodia.

Posted: 10/22/2018 12:52:24 PM
pitts8rh

From: Minnesota USA

Joined: 11/27/2015

You must be an early riser too!

Thank you for your interpretations - I agree with everything you say.  Even the two top photos, where the screw is clearly darker, I can in one moment imagine a satin black panel with light reflecting off the sheen.  But most of the time I see dark brown.  Who knows... 

I think in the end I'll just pick and choose what looks reasonably authentic but also makes it look attractive too.  If I could find some decent lighter walnut I would consider using that, but our sources around here are terribly picked over most of the time.  I can't find anything approaching the quality of the walnut Etherwave case that I have.

I'll check out the link you gave me when I return.  I have not run across that before.

Roger

Posted: 10/25/2018 2:03:59 PM
DOMINIK

From: germany, kiel

Joined: 5/10/2007

Hi Roger.

There also has been at least one different designed Melodia.. scandinavian style, wood is birch. Well.. no, this was my not so detailed take on the Melodia in 2007. I guess my DIY coils are not best, for a reliable performance i finally adjusted it for three octaves. What i still find fascinating is the circuits simplicity.

Exciting to read and see what you do. If you want highres scans of the EVEREADY 9V ... no problem.

You must be logged in to post a reply. Please log in or register for a new account.