Build Project: Prototype III - D-Lev Digital Theremin

Posted: 3/25/2021 1:52:43 PM
pitts8rh

From: Minnesota USA

Joined: 11/27/2015

"Roger, for some reason all of your pictures are blank in my browser?" - Dewster

That's because I barred you!  Consider yourself barred!

Not really, I don't know what the problem is.  I tried from several different browsers and my wife's computer and they are all working even when I'm logged out.  Are you seeing anything at all?

[Edit] WTH?  I just posted a normal reply and it came out in giant font with all kinds of modifiers tacked on in the code.  Maybe it's a temporary website problem for both of us.

PS: I should note that if you can't see my theremin videos it's because I've made them private.  I'll email later today.

Posted: 3/27/2021 2:55:10 PM
pitts8rh

From: Minnesota USA

Joined: 11/27/2015

The Joys of CNC

I was late to the table in accepting 3D printing, and the same goes for CNC machining whether it's for wood or metal.  I have always liked woodworking and metalworking (doing it the manual way), but I could kick myself for not automating sooner.  I think the big deterrent was that without any 3D modeling skills you can't do much with 3D printing or CNC machining, but the D-Lev project has provided a motivation to make these easier and much more fun to learn.

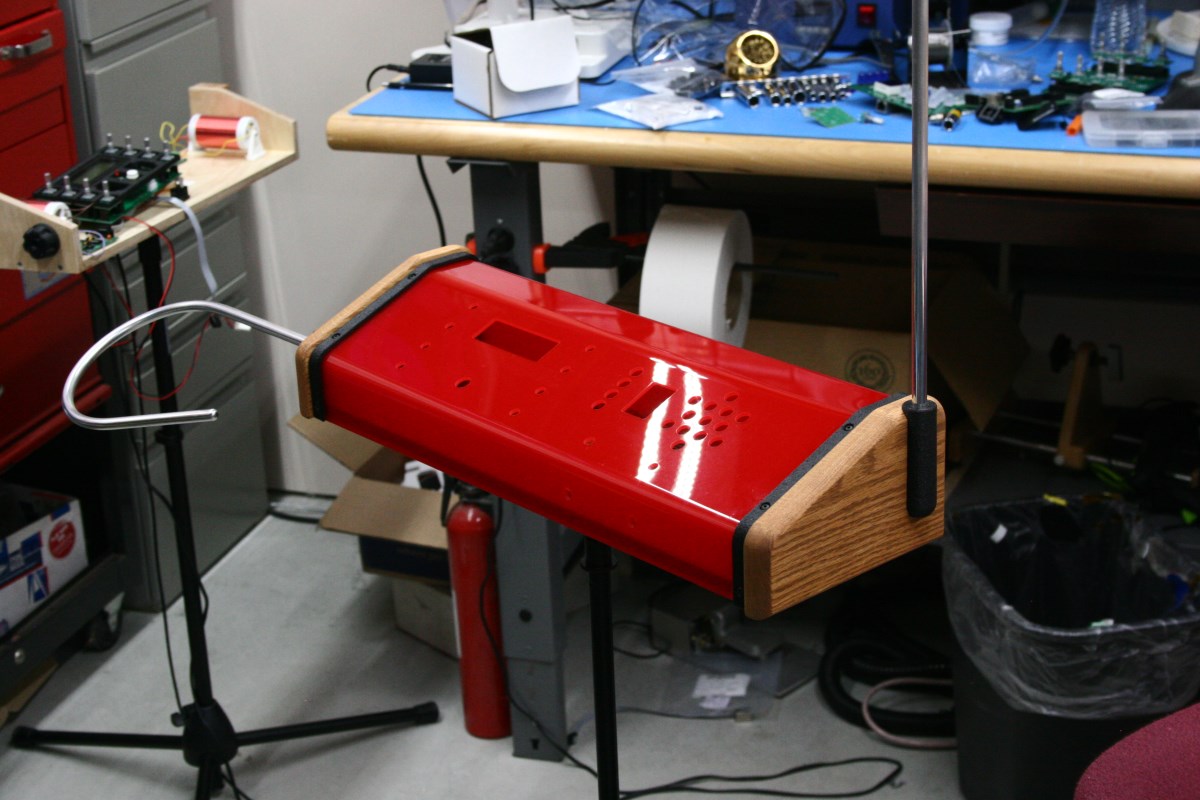
Case in point, the relatively simple baltic birch carcase for my PIII D-Lev prototype would in the past have been made by routing around accurately-made patterns.  The end plates of this enclosure are easy enough to produce with a flush-cutting ball bearing router bit following a thin ply wood pattern.  But after making two ends manually and looking at the holes that needed to be drilled I decided to draw it up in Solidworks and try routing the whole thing, holes and all.  I found as I was drawing it that I started adding slots and pockets that otherwise would not have been put in due to the setup time to route them manually. And this is one of the huge benefits that I have failed to consider while justifying sticking with the old methods.  Not only is it like having an employee fabricating something while I get to work on something else, the level of precision, detail, and added safety are all factors that I never considered.

Anyway, I'm on board now, even though I'm still taking baby steps.

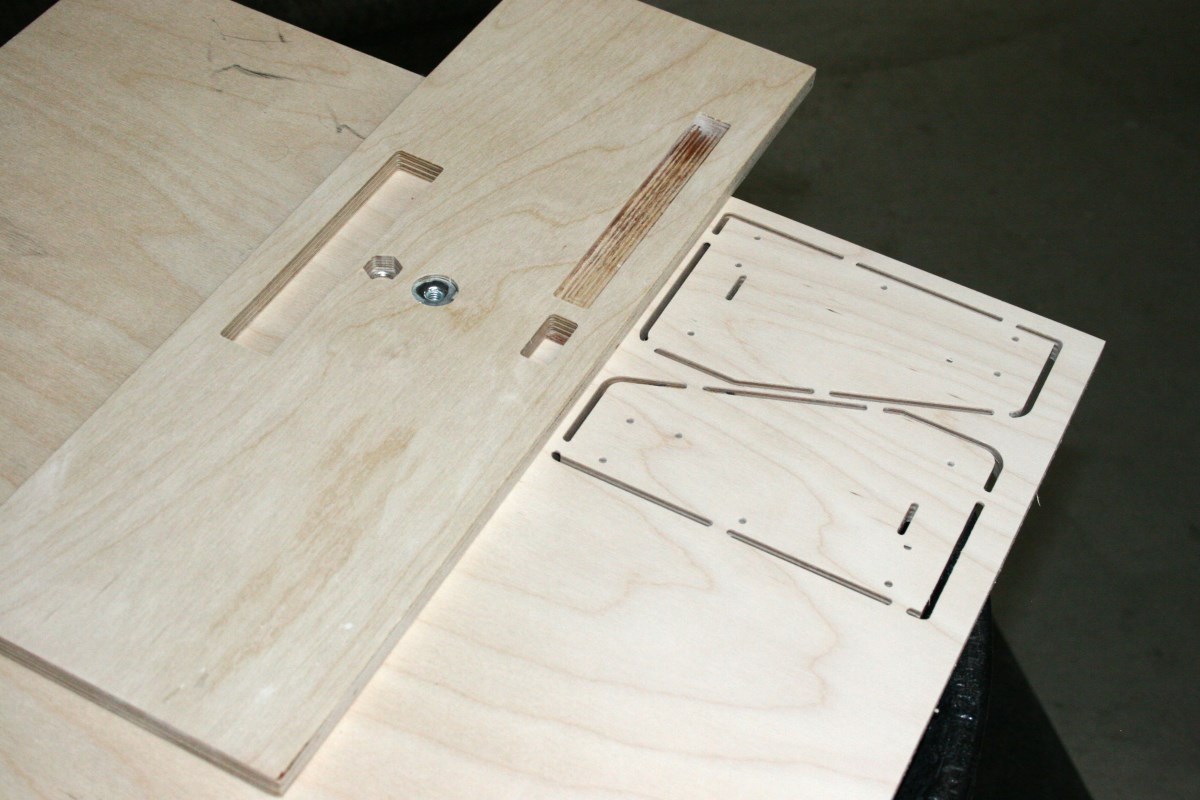
Below are the carcase' base and ends for the PIII enclosure. Granted this is all simple stuff but I am new to all of this - the CAD, the CAM, Solidworks, and the machine control software (Mach3).  In the base panel the snap-in power switch pocket and the hex cutout for the power connector nut are things that simply would never have been done by hand, as is the case with the slot in the end panels.  The part of the ends that you will see when the acrylic cover is in place will be slightly larger panels made of some choice of hardwood, and I don't see any reason to not use the same process to cut these out too.  All of this is making me rethink about having an all-wood sloped case (except for a flat panel) which is a little tedious to make manually.

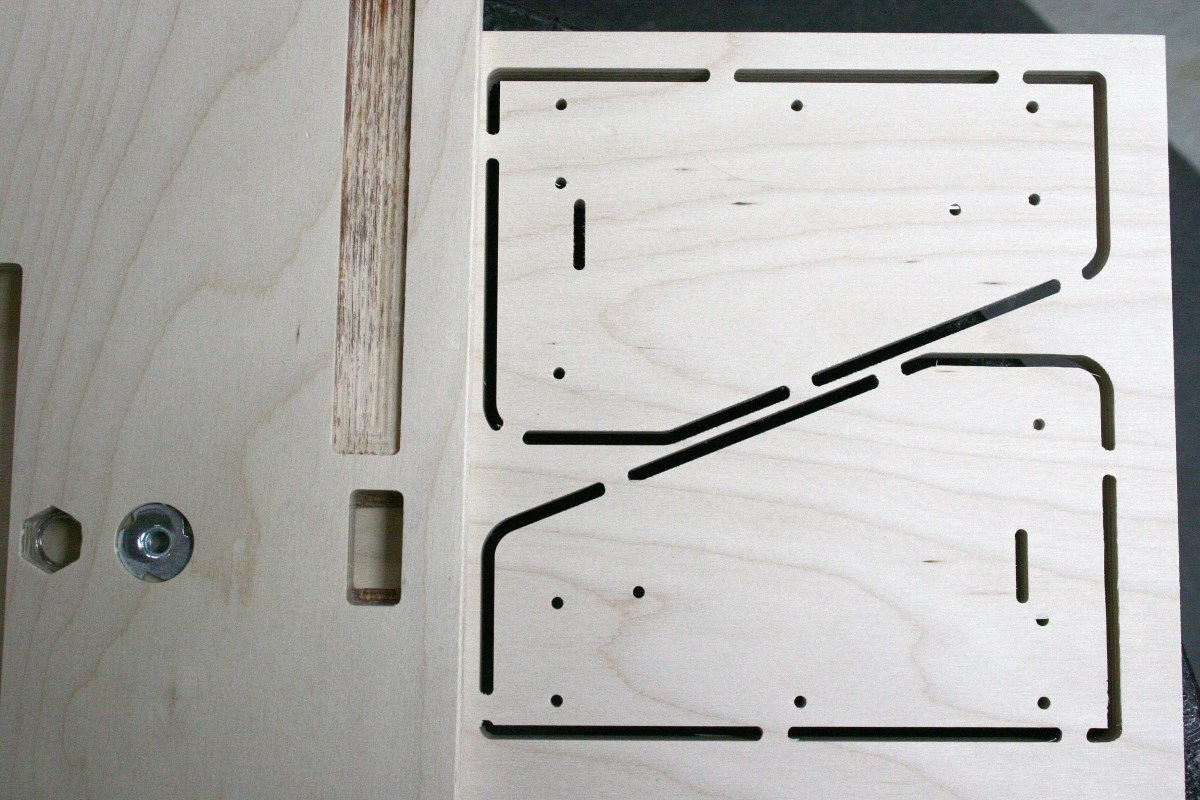
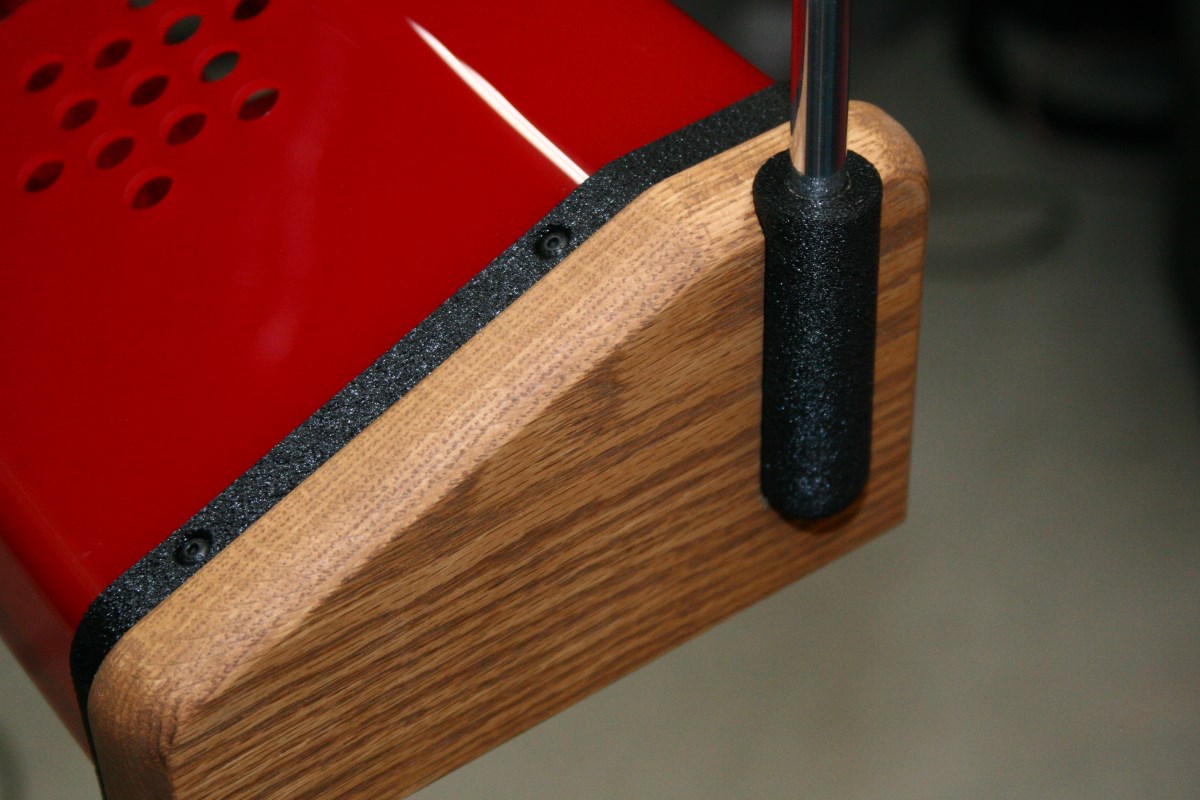
BTW, the tabs holding the end pieces in the stock are only .060" thick and the parts can be easily removed with an X-acto knife:

[right-click > view image to see a larger picture]

Posted: 3/28/2021 11:47:00 AM
dewster

From: Northern NJ, USA

Joined: 2/17/2012

"I think the big deterrent was that without any 3D modeling skills you can't do much with 3D printing or CNC machining..."  - pitts8rh

This is what held me back from even thinking about 3D printing.  My experience with AutoCAD years ago completely turned me off to 3D CAD and I didn't think I had it in me to try again.  But OpenSCAD, for as clunky as it can be, has renewed my interest.

"... but the D-Lev project has provided a motivation to make these easier and much more fun to learn."

I don't know what it is about Theremins, but for many they seem to dramatically expand one's technical skill set.  I learned Visual Basic in Excel for my first LC DPLL simulations, SystemVerilog and processor design, anti-alias synthesis, etc.  Usually niche projects pump up a narrow set of mental muscles, leaving all the others to languish in flabby land.

"Anyway, I'm on board now, even though I'm still taking baby steps."

You're literally "on board" now!

A long time ago I watched a video of an electric guitar body being routed on a CNC mill and thought "No fair!  That's way too easy!"  But was also mesmerized by it.  A lot of precise labor is best done via CNC.  Your setup is making me jealous!  You could make Theremins for the entire civilized world from your basement and barely lift a finger (except to press the "start" button :-).

Posted: 4/10/2021 6:58:41 PM
pitts8rh

From: Minnesota USA

Joined: 11/27/2015

Playing with Tolex

I've never used Tolex covering material before but it's pretty neat stuff.  It's used all kinds of equipment cases and speaker cabinets because of its durability, and it comes in a large number of textures and colors. I probably would have found many uses for it in the past where I've just bought regular vinyl from fabric stores. 

The material that I received a few days ago has a nice texture and a soft rubbery feel, and it applies beautifully over even tight curves with a little help from a heat gun.  I took one of my reject PIII acrylic panels and coated it and a small piece of Tolex with contact cement (not something I would use on acrylic but I had it on hand) just so I could test the application.  After the two parts dried a while I applied the material and rolled it down, and it conformed much better than I expected around the raw lower front edge of the panel.  Even though the texture is pretty strong for a front panel I like the look, and it matches the Cura-sliced fuzzy-printed plastic hold-down strips (shown below with the red panel) amazingly well.

This is already going to find a use on my own PIII even if it's only for the bottom of the case.  But if I get tired of the shiny acrylic top this (or some other variant) is what I'll cover it with.

There are plenty of YouTube videos demonstrating how to apply this around corners and edges so that it almost looks like a sprayed-on texture finish.  This material (called Cat Tongue) came from https://www.mojotone.com/TolexCarpetTweed_x#/.  They also have some tweeds that seem look a lot like the new Claravox front.

Posted: 4/15/2021 6:14:04 PM
pitts8rh

From: Minnesota USA

Joined: 11/27/2015

You Can Have Any Color As Long As It's Red

Well, not really.

I'm putting together a D-Lev PIII (PIII=my 3rd prototype) using the materials that I won't be heartbroken if I damage them along the way.  That means starting with the red panel first before black, white, or my personal choice of ivory:

I also made my wood ends out of some plain oak thinking that they wouldn't make it through all the operations, but they did so I'll probably use them.  I was toying with the idea of staining the oak ends black, but maybe natural wood isn't a bad choice either.

The volume antenna tightens at any angle.  The pitch antenna is a simple push-in without any tightening knob.  The Moog Melodia simply has the pitch antenna resting on the head of a screw at the bottom of a hole in the wood.  Here I went one better and drilled a hole in the end of the antenna that pushes onto a banana plug molded in the bottom of the black antenna sleeve.  It's simple and positive with no wrenches needed for either antenna:

Finally, I gave up on trying to hide the cover screws and instead I tried to make them as discreet as possible by countersinking them into these printed end bands.  This is functional in that it distributes the screw pressure on the ends of the acrylic panel and cosmetically it helps hide any gap between the panel and the wood ends.


Posted: 4/16/2021 3:04:34 PM
dewster

From: Northern NJ, USA

Joined: 2/17/2012

"You Can Have Any Color As Long As It's Red"  - pitts8rh

Ha!  Reminds me of: "when you work for yourself you're not tied to a schedule, you can work any 80 hours you want".

I'm guessing the oak sides are somehow affixed to the existing plywood ends, and that the exposed screws are going into the plywood?

"Here I went one better and drilled a hole in the end of the antenna that pushes onto a banana plug molded in the bottom of the black antenna sleeve."

The antenna sleeve is 3D printed, not molded, correct?  I know you can do both which is why I ask!  The texture on it and the screw bands appears very similar to your cat (got your) tongue Tolex.  How is the antenna sleeve attached to the oak?

It's looking really sharp!

Posted: 4/16/2021 6:16:37 PM
pitts8rh

From: Minnesota USA

Joined: 11/27/2015

"I'm guessing the oak sides are somehow affixed to the existing plywood ends, and that the exposed screws are going into the plywood?" - Dewster

The oak ends are screwed to the 1/2" plywood ends of the carcase from inside. 

The acrylic panel screws are 3mm button head machine screws that go into five brass inserts in each plywood end.  This was done to make the cover removable without the risk of wearing out the wood screw holes.

"The antenna sleeve is 3D printed, not molded, correct?  I know you can do both which is why I ask!"

Yes. It's like half of a hot dog that is screwed into the 7/8" diameter cove channel routed in the end panel.  It's easy to print and very strong.
 
"How is the antenna sleeve attached to the oak?"

There are four #2 trilobular screws going into the plastic from the inside, two on either side of the antenna rod. I'm going to do some tests to make sure that those screws or the plastic sleeve will break away before inflicting more serious damage on the enclosure if the antenna gets seriously bumped.  If it's too strong I may turn down a short section of the 3/8" aluminum rod at the entry point of both antennas so that they will act as mechanical fuses to bend or break first. 

You must be logged in to post a reply. Please log in or register for a new account.