Let's design and build cool (but expensive) FPGA based theremin

Posted: 9/21/2018 8:52:40 AM
Buggins

From: Porto, Portugal

Joined: 3/16/2017

Received my waveshare 4.3" LCD


Still waiting for PCBs, Cora FPGA board, audio PMods, 40KV cable...

Working on plywood laser cut cabinet design (etherwave form factor).

Theremin Controller AXI IP is mostly ready (redesigned from scratch). Additional feature added: ability to override volume and/or pitch value - useful to test synthesizer settings.

Posted: 9/21/2018 2:05:01 PM
Buggins

From: Porto, Portugal

Joined: 3/16/2017

Plywood laser cut cabinet design:

Plywood: 8mm
Classic cabinet form factor - is close to Etherwave, but 20mm wider.
"Plumbing" style antenna mount.
Atlas 5/8" mic stand flange is mounted to bottom.
Waveshare 4.3" LCD is mounted to cover.
Front and read panels are made of aluminum angle profile 20x40mm.

Posted: 9/21/2018 2:30:39 PM
Buggins

From: Porto, Portugal

Joined: 3/16/2017

4.3" LCD mount laser cut design:

Top panel


Bottom (mounting) panel

Posted: 9/26/2018 8:10:48 AM
Buggins

From: Porto, Portugal

Joined: 3/16/2017

Project status update (with nice pictures).

Received most of hardware orders (except cables).

PCBs (oscillator and shield):
Received from DirtyPCBs - 15 oscillator PCBs and 10 PCBs boards just because 1 and 15 (1 and 10) cost is the same $20.


Diligent Cora Z7-10 FPGA board with PMods I2S2(line in/out) and AMP3(headphones):

Everything together (gray thing is for mounting of coils):

Now I have to wind coils, solder oscillators and shield.

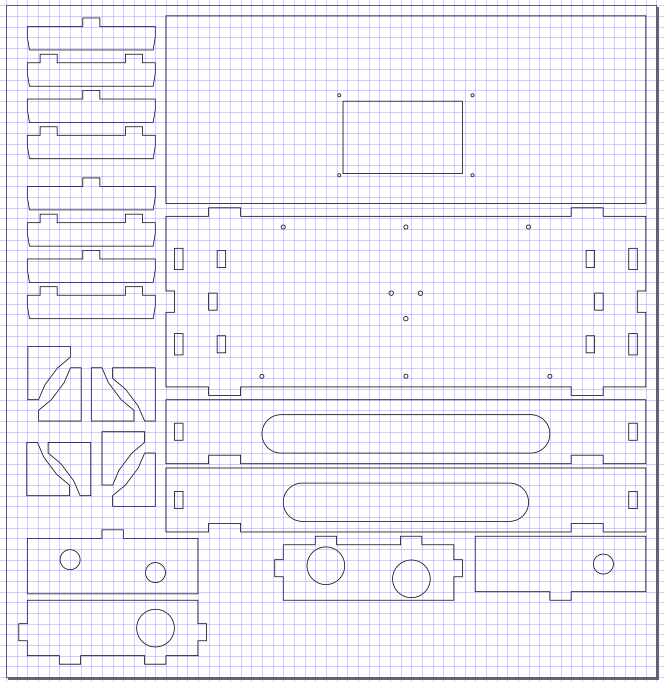
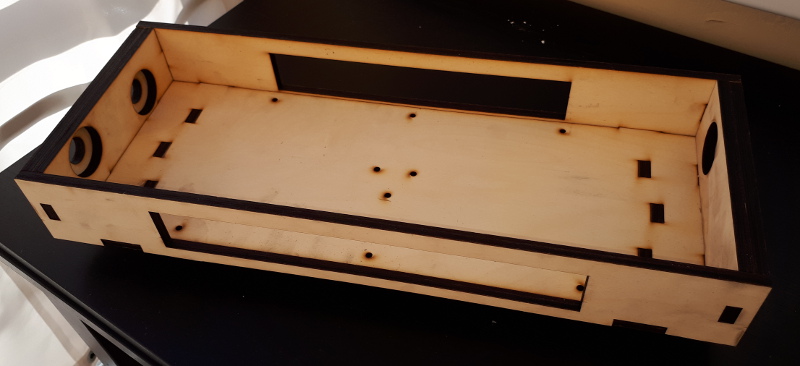
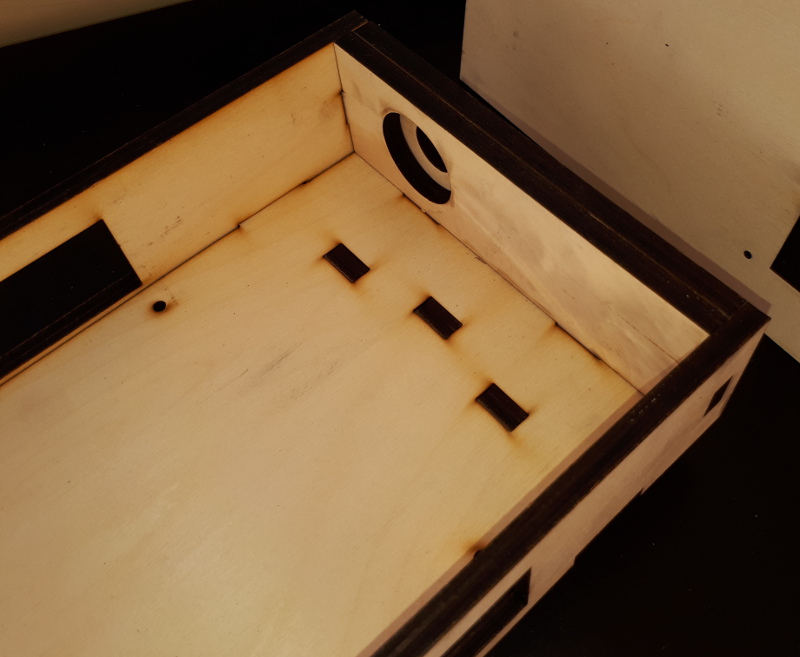
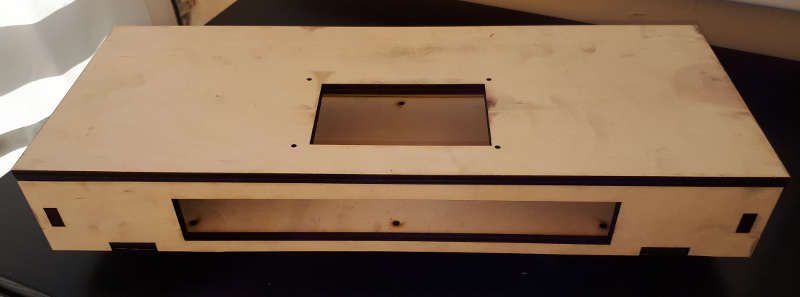
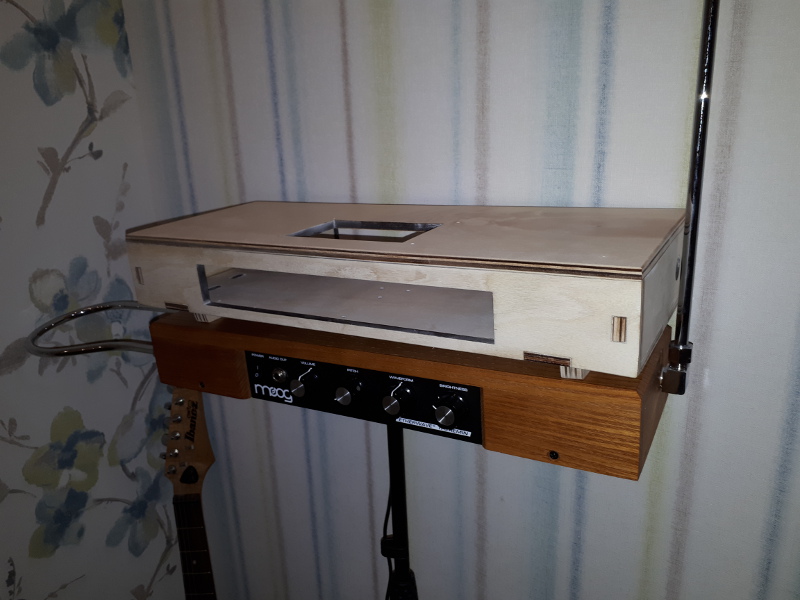
Cabinet plywood laser cut design - mostly finalized, going to order manufacturing soon.

Software part update:

- AXI4Lite Theremin Sensor Controller verilog code is mostly ready - to be tested on hardware with real oscillators and antennas.
-Audio IO IP in verilog - I2S (two stereo outputs and one stereo input 48KHz 24bit) and I2C (for headphones volume control) are implemented - to be tested on hardware.
- Making simple triangle tone generator for end-to-end testing (pitch+volume from sensor -> tone generator -> audio output).
- Display controller IP: I have written HDMI OUT adapter with DMA for Zybo board - can be easy ported to parallel RGB interface.
- Resistive touch screen controller IP - to be done.


Posted: 9/27/2018 3:07:55 PM
Buggins

From: Porto, Portugal

Joined: 3/16/2017

I've created GitHub project to share my design details. Several articles added on project Wiki.

Will put build instructions, and design files here.

I believe at least cabinet and antennas design may be helpful for other digital and analog DIY theremin projects.

Oscillator design - for digital theremin projects.


Published:

* Theremin cabinet plywood laser cut design

* Oscillator schematic LTSpice file

* Oscillator PCB design: DipTrace + Gerber files

* PCB design is shared via DirtyPCBs.

Posted: 9/28/2018 6:07:27 AM
Buggins

From: Porto, Portugal

Joined: 3/16/2017

Laser cutting is done!

Updated laser cut design (8mm plywood):


Trying to assemble - checking if all sizes are correct:

Issue found: rounded edges of front and back panel holes were lost

Pitch antenna side:

With cover:


Article about this cabinet design is available here on github. Laser cutting design in InkScape SVG format is available.

TODO: glue, polish, varnish...

Posted: 9/28/2018 4:19:46 PM
dewster

From: Northern NJ, USA

Joined: 2/17/2012

Nice!  Do the laser burned edges stick out some so you can sand off the darkness?

I've had really good luck with flakeboard for speaker cabinets and such.  It's inexpensive and much more uniform than any other wood product I've used, and doesn't have serious warping / void / knot issues.  Mix up some soupy water-based wood filler to fill the outer layer, perhaps adding some stain to it first, do a couple of coats of this and sand flat.  Edges can take a nice big radius as well, so you can use those nifty PA cabinet corner protectors if you like.

Posted: 9/28/2018 4:36:04 PM
Buggins

From: Porto, Portugal

Joined: 3/16/2017


Nice!  Do the laser burned edges stick out some so you can sand off the darkness?


I didn't guess to make edges longer.
Will try next time.

Ray width is about 0.2mm (0.1mm at each side of cutting line), so probably it's possible just polish everything by 0.2mm () to remove burned darkness.
Another solution - to cover it with some dark varnish or paint.

Posted: 9/28/2018 5:19:01 PM
dewster

From: Northern NJ, USA

Joined: 2/17/2012

My box building generally goes like this: 

1. Cut everything out with a few mm intentional excess to stick out.
2. Glue 4 sides together to make a tube, clamping with drywall screws and fender washers.
3. When glue is dry, remove screws and trim excess with laminate bit in router (this works great).
4. Make tube opening edges flat and even with long sanding stick (learned this making guitars).
5. Repeat steps 2 & 3 for remaining 2 end pieces.
6. Round corners with router.
7. Fill screw holes and other voids.
8. Sand.
9. Many coats of latex water-based varnish.

I use a radial arm saw, so when I'm cutting the 4 sides I make sure I cut the dimension they all share in one pass, which minimizes sanding in step 4.  

The 4 sides are often rabbet jointed, with the remaining 2 sides butt jointed, but I've done butt joints everywhere too when the material is thick enough and stable enough.

If you follow these steps no dimension is critical, and all the joints will be super tight.

Posted: 10/1/2018 6:16:52 AM
Buggins

From: Porto, Portugal

Joined: 3/16/2017

Assembled (glue + a few screws) and polished.
Polishing removes burn stains well enough - no need to make some edges to stick out.
Comparing with Etherwave:

I believe covering it with dark color varnish will make it look better.

More photos are available on GitHub Wiki page Cabinet Design article

You must be logged in to post a reply. Please log in or register for a new account.